Welcome To The Shakin 'N Bakin Blog!
Welcome to my blog! I love to cook and bake for my family. I hope you enjoy the recipes, foodie reviews, foodie giveaways and cooking tips posted on my blog.
How to Print Recipes: You can print out each individual recipe featured on this blog by clicking the "share" button at the bottom of each post. It will open up to show you options, click on print and another window will open up with the recipe inside it for printing. You can also use the SHARE button to email a copy of the recipe to yourself for printing later.
Saturday, December 1, 2018
Mexican Buñuelos Recipe
Mexican Buñuelos Recipe
* Photo by La Palomilla
3 cups all purpose flour
45 g butter
1 ½ tsp baking powder
3 eggs
For the tea:
1 cup hot water (must stay warm)
1 stick of cinnamon
Anise
Orange zest of one orange.
Sugar topping:
1 ½ cup sugar
1 TBSP cinnamon
1. Beat by hand: Flour, eggs, baking powder and butter. Start adding the ¨tea¨until you get a sticky texture.
2. Place in a plastic wrap and refrigerate for an hour.
3. Remove from the refrigerator. Extend the batter and cut in 12 pieces.
4. Place 1 lt of cooking oil In a deep pan. Cook buñuelos for 1 minute and a half on each side.
5. Take excess oil off. Once buñuelos are fried and done, sprinkle generously with the sugar and cinnamon mixture.
Wednesday, January 11, 2017
Breakfast Black Bean Burritos Recipe
Looking for a delicious hot breakfast recipe that doesn't take a lot of time to make? What about a special brunch recipe that's different than the typical breakfast casserole? We love Mexican food and these breakfast burritos really hit the spot and fill you up. They are super easy to prepare and you can change up the recipe to suit your own liking. Sometimes we substitute the Pico de Gallo with our favorite peach & mango salsa or we will use some guacamole instead. If you want to add even more flavor, you can chop up some onions, green bell peppers and/or mince up some garlic and toss it into the egg mixture and then proceed with cooking the recipe.
1 tsp. GOYA Extra Virgin Olive Oil
4 - 8" GOYA Flour Tortillas
4 eggs, plus 4 egg whites, lightly beaten
1 can 15.5 oz. GOYA Low Sodium Black Beans, drained & rinsed
1/2 cup GOYA Pico de Gallo, drained
Heat 1/2 tsp. of olive oil in a medium non-stick skillet over medium-high heat; add tortilla. Cook, flipping once, until light golden brown on both sides. Transfer tortilla to place. Repeat with remaining tortillas.
Heat remaining olive oil in the same skillet. Add the lightly beaten eggs. Cook, stirring eggs with spatula, until scrambled and just set, about 4 minutes.
Assemble Burritos: Place 1 tortilla on work surface. Add 1/4 scrambled egg mixture, 1/4 cup black beans and 2 Tbsp. Pico de Gallo. Fold left and right ends over filling. Then, holding the closed ends, fold tortilla in half from bottom to top. Using the top layer of tortilla, push filling towards you to compact filling. Roll tortilla into log and place seam-side down on plate. Cut in half and serve immediately.
Tuesday, January 3, 2017
Grilled Herb-Rubbed Halibut Recipe
When it comes to busy weeknight dinners I'm always looking for recipes that take me less than 45 minutes to make. Let's face it, we're all busy these days and I just don't have an hour or two during the weekdays to spend in my kitchen!
A few weeks ago I came across this recipe which I'm featuring today from GOYA and it's delicious! You only need a handful of ingredients to make it and in less than 40 minutes you'll have a hot dinner onto the table. The recipe calls for halibut, but we've also used salmon fillets at times too. Here's the recipe. Thanks GOYA!
4 boneless, skinless halibut fillets (4 oz. each)
1 Tbsp. GOYA Sazonador Total, divided
1 Tbsp. GOYA Lemon Juice
1 tsp. Dijon Mustard
2 Tbsp. GOYA Extra Virgin Olive Oil
Using paper towels, pat halibut dry. Coat completely with the 1 1/2 tsp. Sazonador Total, pressing to adhere on fish. Transfer fish to platter, cover and refrigerate for at least 15 minutes, or up to 1 hour.
Meanwhile, in a small mixing bowl whisk together remaining Sazonador Total, lemon juice and Dijon mustard. Slowly drizzle in the olive oil, whisking constantly, until well combined.
Heat grill to medium-high heat. Using a pastry brush, brush halibut with olive oil mixture. Cook halibut, flipping and brushing with the glaze, until golden brown and just opaque in center (about 4-6 minutes per side). Serve immediately.
Sunday, November 13, 2016
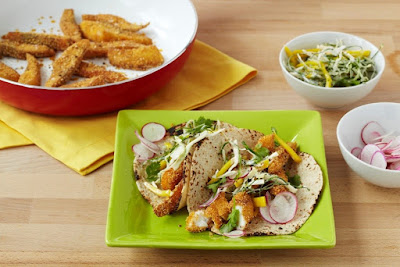
Polenta-Crusted Fish Tacos with Slaw Recipe
Polenta-Crusted Fish Tacos with Slaw Recipe
2 to 3 pieces of tilapia
¾ cups polenta (or fine cornmeal)
1 teaspoon paprika
olive oil
salt
cilantro and sliced radishes for garnish
4 to 6 corn tortillas
1 tablespoon mayonnaise
2 tablespoons sour cream
1 teaspoon chipotle hot sauce, like Tabasco
1 teaspoonlime juice
1 pinch of salt
1 cup cabbage
1 mango, ripened but hard
1. Make slaw by mixing the first five ingredients until smooth and then mixing it with the cabbage and mango. Set aside.
2. Mix paprika and polenta together in a shallow bowl.
3. Season tilapia strips with salt and press into polenta, making sure it's completely covered. Discard excess polenta.
4. Heat 1-2 Tblsp. of olive oil in your IMUSA non-stick sauté pan and once it begins to smoke, add the tilapia. Fry the tilapia in batches, about 2-3 minutes per side, until slightly browned and fully cooked. Remove onto a paper-towel lined dish.
5. Heat corn tortillas in the IMUSA tortilla warmer and serve fish tacos.
6. Assemble by placing some slaw in the center of the tortilla and one or two slices of tilapia on top. Top with cilantro leaves and radish.
Friday, July 22, 2016
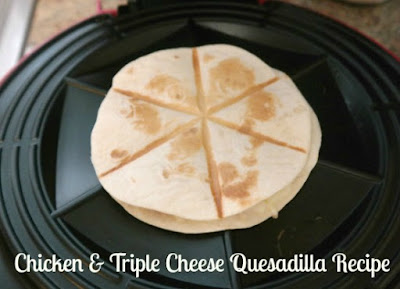
Easy Chicken and Cheese Quesadilla Recipe
Easy Chicken and Cheese Quesadilla Recipe
Flour Tortillas - 2 per Quesadilla
1 to 2 cups Cooked & Diced Chicken
1/2 to 1 cup Diced Red Tomatoes
1/4 cup Shredded Cheddar Cheese
1/4 cup Shredded Mozzarella Cheese
1/4 cup Shredded American Cheese
1 to 2 Tbsp. Finely Chopped Onion
Preheat your quesadilla maker. Once it's heated up, lay down the first tortilla. Sprinkle a little bit of shredded cheddar cheese on top. Next toss on the cooked & diced chicken, then the shredded mozzarella cheese, then the diced red tomatoes and then the shredded American cheese with chopped onion. Place the second flour tortilla on top. Close the lid and cook for 1 1/2 to 2 1/2 minutes or until cheese has thoroughly melted and all of the filling ingredients are bubbly & hot. Remove and let sit for 2-3 minutes before cutting into wedges.
Serve your sliced quesadilla wedges with sour cream, guacamole and/or your favorite salsa for dipping. Delicious!
Friday, February 12, 2016
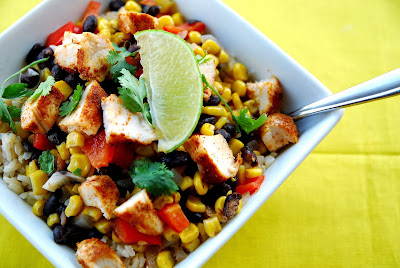
Mexican Chicken Burrito Bowl Recipe
I love Mexican food, all types of Mexican food. However, I tend to stay on the mild to the moderate heat side of things but hubby loves his spicy hot! How do you enjoy yours? Our recipe today is courtesy of BistroMD. This recipe does take some time to prepare but your efforts will be well-rewarded!
For the Chicken:
4, 4 oz. boneless skinless chicken breasts, shredded
Sea Salt, Black Pepper, Paprika and any other of your favorite spices to season (optional)
Red Burrito Sauce:
½ tablespoon unsalted butter
1/2 tablespoon corn oil
1 yellow onion, chopped
1 tablespoon masa flour
1/2 cup low sodium, chicken broth
½ cup tomato sauce
½ teaspoon granulated garlic
½ jalapeno pepper, diced
1 teaspoon lime juice
½ teaspoon chili powder
½ teaspoon paprika
1 teaspoon oregano
Pinch of Sea Salt
Bowl Ingredients:
1 cup cooked brown rice
1 Lime, juiced
1 can (15 oz.) reduced sodium black beans, drained and rinsed
2 ears fresh corn OR 1 can (15 oz.) reduced sodium, organic corn kernels, rinsed and drained
1 cup bell pepper, any color(s), diced
1 cup fresh tomato, diced
1 tablespoon Cumin
¼ cup Fresh Cilantro, chopped
2 Garlic Cloves, chopped
Jalapeno or other hot pepper, diced (optional)
Garnish (optional)
Reduced-fat Cheddar Cheese
Chopped Cilantro
Red Burrito Sauce:
In a medium skillet, heat the corn oil and unsalted butter over medium heat. Add the chopped onion and jalapeno and saute until onion becomes translucent, about 5 minutes. Sprinkle the masa flour and whisk together. Allow to cook 2 minutes. Gradually add the chicken broth; constantly whisk to ensure no clumps of flour. Adjust heat to medium-low. Add tomato sauce, granulated garlic, lime juice, chili powder, paprika, oregano and pinch of sea salt. Stir together, cover, and allow to simmer for about 20 minutes.
Burrito Bowl:
While the sauce is simmering, add lime juice and fresh chopped cilantro to the cooked brown rice and blend together. Add the blacked beans, corn, bell pepper, tomato, cumin, garlic and jalapeno to a medium sized bowl and mix. Divide the rice into 4 portions. Divide the black bean and corn mixture into 4 portions.
Monday, December 21, 2015
Red's All Natural Burritos
Recently my family had the opportunity to sample some of the Red's all natural frozen burritos. We were able to pick them up at our local grocery store and selected the Steak & Cheese Burrito and two of the Chicken & Cheese Burritos. While my grocery store carried them, they didn't carry all of the wonderful flavors that they're available in. Sigh.
We decided to make ours one day for lunch. We decided to do the regular oven method which required us to take them out of the freezer and microwave for 1 minute on the high power setting. You then transfer them to a baking sheet and bake in a regular oven for 12-15 minutes. While they were baking...I whipped up some quick side salads to go along with them.
You can learn more about Red's All Natural Foods by visiting their site online. In addition to the frozen burritos, they also have burrito bowls too!
Disclosure: Shelly received complimentary products for this foodie blog feature & review. No monetary compensation was received. Regardless, Shelly's opinion on the products are 100% her own and were not influenced by the sponsor. You opinions may differ.
Thursday, July 2, 2015
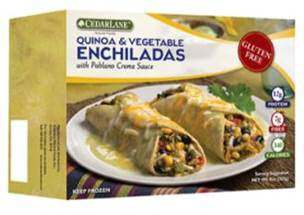
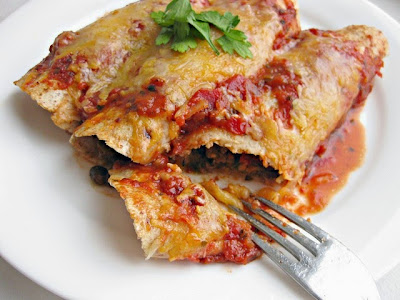
CEDARLANE Quinoa and Vegetable Enchiladas
Recently we were given the opportunity to try out the new Cedarlane Quinoa & Vegetable Enchiladas with Pablano Crema Sauce. These enchiladas are gluten-free and contain 12g of protein, 7g of fiber and only 340 calories per serving. Each enchilada is packed with quinoa, black beans, Monterey Jack and cheddar cheese as well as roasted Anaheim peppers, tomatillos, corn, bell peppers, onions, mushrooms, yellow squash, black olives, and zucchini—all topped with a delicious Poblano Crema sauce.
Last week we needed something quick, easy and hot for lunch so I prepared both boxes of the Cedarlane Quinoa & Vegetable Enchiladas. As they were baking in the microwave my house started to smell sooooooooo good! That nice aroma really hyped up our taste buds before lunch even hit the table. Once they were done, we left them "stand" for 2 minutes per the package directions.
I would not hesitate in buying the new Cedarlane Quinoa & Vegetable Enchiladas. Matter of fact, I am going to look for them in my grocer's freezer section the next time I go grocery shopping. I think it would be nice to have several boxes of their entrees stocked in my freezer for when we need a quick bite to eat or will be out on the road traveling.
You can learn more about Cedarlane and all of the delicious foods that they make by visiting their site online and by connecting with the company on Facebook.
Disclaimer: Shelly H. has personally reviewed the product listed above. Shelly has not received any monetary compensation for her review. Shelly did receive a free product to try out so she could evaluate and use it for her review. Her thoughts & opinions in this review are unbiased & honest and your opinions may differ.
Posted by
ShellyH
at
6:00 AM
1 comments
![]()
Labels: Freezer Meals and Food, Mexican Recipes, Product Reviews
Tuesday, May 5, 2015
Zone Manhattan’s Lobster Pea and Pablano Enchilada Recipe
Recipe is courtesy of Zone Manhattan.
Zone Manhattan’s Lobster, Pea and Pablano Enchilada
Serves 12
Lobster - 1 ¼ lb.
Crepes -12
Pea Tendrils
Veggies for Filing- onions, Peas, Lime Juice and Zest, cilantro, Roasted Pablano
Cooked Black Beans - ½ lb
Green Squash - 1 c. Diced Small
Snow Peas - ½ c. Sliced Small
Grilled White Corn Cut off cobb
Chayote- ½ c Small dice
Baby Pepper- 1cs Sliced Round and Roast
Monterey Jack cheese - ½ pc.
Roasted Tomatillo and Green Pea Salsa
Tomatillo- 5 ea Dice and Roast
Lime- 1 Juice and Zest and Cilantro
Avocado- ½ Diced
Whole Wheat Crepes
Cook Lobster for 15 min in boiling water, cool and remove meat and dice. Sauté Veggies for filling until cooked, then cool. Mix Lobster and Veggies, add Juice and Zest of ½ a lime. This and cheese is your filling for the enchilada. Trim Crepe and Roll Enchilada. These can be made in advance and heated for 1 ½ min in a micro with Cheese and Salsa on top. Whole Wheat Crepe as Tortilla, Roll and Warm in Micro for 1 ½ min. Season Black Beans with Cilantro, Toasted Cumin and Lime Juice and Zest. Add Orange Grape Tomatoes, Diced Vegetables and roasted Corn. Mix. This can be made in advance and heated for 1 ½ min in a micro after warming sprinkle over Pea Tendrils.
Thursday, January 22, 2015
Southwest Egg Bacon and Cheese Breakfast Burrito Recipe
Note: You can use as little or as much of these ingredients to suit your own taste buds. Sometimes we mince up some garlic, green peppers or chop up some onions and toss those into our scrambled egg/omelet batter too.
Southwest Egg Bacon & Cheese Breakfast Burrito Recipe
2 flour tortillas
4 large eggs
milk
salt & ground black pepper
chopped tomatoes (we slice cherry tomatoes in half)
1/8 cup Colby Jack cheese, shredded
Guacamole (We use Wholly Guacamole)
4 strips bacon, cooked
When all of your ingredients are cooked and done, layer them in the flower tortilla and then roll it up. Secure it with a colorful toothpick if desired.
Monday, September 15, 2014
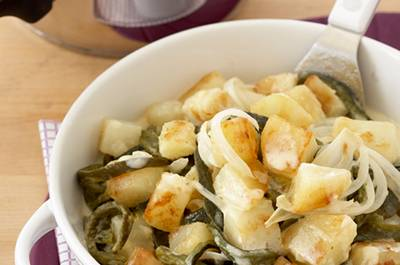
Northern Potato and Poblano Chile Strips Recipe
Hispanic Heritage Month (beginning September 15th) is the anniversary of independence for five Latin American countries (Costa Rica, El Salvador, Guatemala, Honduras & Nicaragua) and what better way to celebrate than with a FIESTA?
This recipe is courtesy of IMUSA - leader in Hispanic cookware.
Poblano Chiles 6
white onion ½
potatoes 1½ pound
canola or corn oil 1 tablespoon
Mexican style cream (crema fresca) or crème fraiche 1 cup
milk or chicken stock ½ cup
salt 2 tablespoons
Place the Poblano chiles on a non-stick IMUSA Comal on high heat and roast until the chile skin is completely and evenly blistered. Turn the chiles on a regular basis to facilitate even blistering. Do not char the chiles. Place chiles in plastic or paper bag for 10-15 minutes. Peel away the black skin as well as the seeds and veins and cut into ⅛ inch strips. Cook the potatoes in an IMUSA sauce pan, adding enough water to cover the potatoes. Add 2 tablespoons of salt. In an IMUSA sauté pan, add the oil and onion. Cook for 3 minutes or until the onions become transparent. Add the potatoes and brown for 5 minutes. Add the chile Poblano strips, cream, milk and salt to taste. Cook for another 5 minutes and serve.
Saturday, September 13, 2014
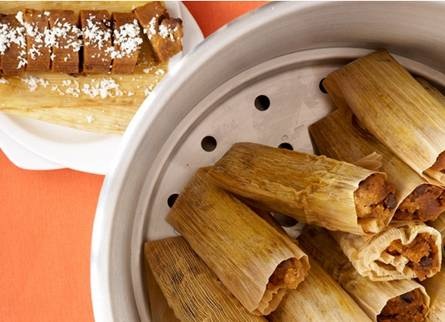
Pumpkin Pie Tamales Recipe
We're only a week about from September and you know what that means... pumpkin flavored everything! From coffee to doughnuts to even pumpkin raviolis 'tis the season for pumpkin-EVERYTHING. IMUSA, leader in Hispanic cookware, is even jumping on the trend with their recipe for "Pumpkin-Pie" Tamales. This recipe takes the traditional Mexican Masa tamales and adds all the fall season's favorite ingredients like ginger, nutmeg, raisins and pumpkin (of course), leaving this sweet side dish a sure favorite with anyone who gets their hands on one.
* Photo and Recipe are Courtesy of IMUSA.
40 to 60 dried corn husks
7 cups maseca corn flour
3 cups packed brown sugar
2 teaspoons cinnamon
2 teaspoon salt
2 teaspoon ground ginger
1 teaspoon ground cloves
1 teaspoon ground nutmeg
2 29-ounce cans of pumpkin puree
4 sticks of butter, melted
2 cups of warm milk
2 cups of walnuts, chopped
12 ounces of raisins
Fill a large bowl with warm water and soak corn husks until softened, about 30 minutes.
In an extra large bowl add Maseca corn flour and the rest of the dry ingredients. Mix together making sure that all of the clumps are broken up with your fingers. Then add all of the wet ingredients and once again, use your hands to mix the corn flour. Add more water as needed until you achieve the consistency of peanut butter. Fold in the walnuts and raisins.
Assemble the tamales by using a rubber spatula to spread 1⁄2 cup to 1 cup of dough mixture onto the corn husk, depending on the size of the corn husk. The spread should cover about two thirds of the husk, away from the pointed end, making sure you leave some space on each side to fold. Gently fold one side of the corn husk to the other end and fold up the pointed end across. Lay each tamale fold-side down. There should be an open end to each tamale.
Once the tamales are folded, fill the IMUSA TAMALE STEAMER with water just below the fill line and place the steam tray on the rack. Carefully place each tamale standing up on the steam tray without overloading it and bring water to a simmer. Steam with the lid on for 90 minutes.
Remove each tamale with tongs and let rest for a few minutes before serving it as a sweet side-dish. MAKES 40-60 TAMALES.
IMUSA Tamale Steamer
When it comes to steaming seafood, or making tamales (a Mexican dish made by steaming masa and filling with meats and cheeses), bigger is better! The IMUSA 16 Qt. Tamale/Steafood Steamer is the perfect size for cooking large batches of seafood, from lobster and crab to mussels and crab legs, and can cook up to 60 tamales.
Disclosure: The recipe and photo is this post are courtesy of IMUSA. All rights reserved.
Wednesday, June 25, 2014
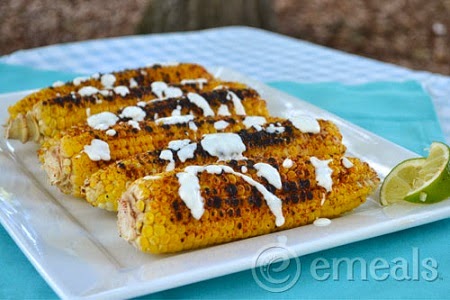
Grilled Mexican Street Corn Recipe
The July 4th holiday is just around the corner and many of us will be hosting or attending backyard barbecues. Part of the standard July 4th fare here at our home is grilled corn on the cob. My family just loves it! Nothing says the Fourth of July like a good old-fashioned BBQ. Grilling out isn’t just about cooking - it’s about entertaining, relaxing and reconnecting with family and friends.
Mexican Street Corn Recipe
• 6 ears corn, husks and silks removed
• 1 teaspoon chili powder
• ½ teaspoon salt
• ⅛ teaspoon black pepper
• ⅛ teaspoon garlic powder
• 1 lime
• ¼ cup low fat sour cream
Instructions
1. Combine chili powder, salt, pepper, and garlic powder in a small bowl.
2. Place corn on sprayed grill rack.
3. Cover and cook 12 minutes over medium-high heat, turning occasionally.
4. Squeeze juice from lime and mix with sour cream.
5. Drizzle over corn and sprinkle with spice mixture.
To Print Recipe: Click on the share button located at the bottom of this post. A new window will open. Then click on PRINT and the recipe will load into the window for printing.
Tuesday, April 22, 2014
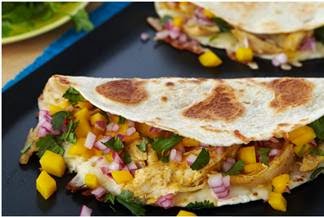
Mango Chicken Quesadillas Recipe
My family loves Mexican cuisine and we probably eat Mexican at least twice a week. Often times we get bored with preparing the same old recipes so I was pretty excited when this recipe landed in my email box and I was asked to share it with my foodie blog readers.
Cinco de Mayo commemorates the Mexican army’s victory over France at the Battle of Puebla during the Franco-Mexican War, and has evolved into a celebration of Mexican culture and heritage. Celebrations in the United States often extend beyond the actual day to encompass an entire week, with parades, festivals and fiestas that include music, dancing, and food.
A dish like Mango Chicken Quesadillias takes the very traditional Mexican dish but combines shredded chicken with brown mustard, honey and Tabasco creating a flavorful filling and adding mango for a sweet twist. By preparing the meal on the IMUSA Cast Aluminum Comal the food is made healthier and the non-stick surface leaves clean up a breeze. Bringing a vigorous, home-style aroma to the party, this traditional Mexican dish will smells as delicious as it tastes.
· brown mustard 3 tablespoons
· honey 2 tablespoons
· Tabasco or hot sauce 3 teaspoons
· salt 1 teaspoon
· Whole rotisserie chicken 1
· mozzarella 1 cup
· small red onion 1
· bunch cilantro 2.1
· ripened mango 1
· 8-10 inch flour tortillas
· non-stick spray
· sour cream, optional
1. Combine first four ingredients in a small bowl and mix with shredded chicken.
2. Heat a large IMUSA cast aluminum Comal on medium heat and spray lightly with some non-stick spray.
3. Add flour tortilla and spray top side with more non-stick spray.
4. After a minute, flip the tortilla and evenly spread ½ cup of cheese.
5. Then spread on half of the tortilla some chicken mixture, onions, cilantro, and mango.
6. Fold over tortilla, like a book, and allow cheese to melt completely. Cut into 4 wedges and serve with sour cream, if desired.
Disclosure: This recipe and photo is courtesy of IMUSA.
Friday, January 3, 2014
Delicious Spicy Hot Nacho Dip Recipe
Spicy Hot Nacho Dip Recipe
8 oz. pkg. Velveeta cheese, softened
8 oz. pkg. cream cheese, softened
2 tablespoons onions, minced
1/2 teaspoon salt
1/4 teaspoon ground black pepper
1 to 2 tablespoons hot sauce
* optional - chopped black olives
In a large saucepan, melt the Velveeta cheese and cream cheese over low heat. Once melted, stir in the minced onions, salt, ground black pepper and hot sauce. Simmer over low heat for 2 minutes, stirring constantly to prevent sticking and scorching. Remove from heat and serve immediately.Refrigerate all leftovers and reheat in a microwave for later use.
Saturday, October 12, 2013
Tomato and Chile Pepper Mexican Salsa Recipe
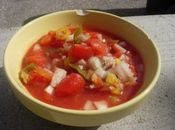 My entire family loves Mexican food and personally, it's one of my favorite cuisines. About 15 years ago my grandmother taught me how to make her delicious Tomato & Chile Pepper Salsa and ever since...I have been making it for my own family to enjoy.
If you like your salsa spicier and with more heat, you can add additional chopped chile peppers and a few drops of your favorite hot sauce. Once you have prepared the salsa, refrigerate it for several hours...so that those flavors really blend together nicely.
Tomato and Chile Pepper Salsa Recipe
28 oz. can diced tomatoes
1/3 cup green Chile peppers, finely chopped
1/4 cup onions, finely chopped
1 clove garlic, minced
1 teaspoon salt
1/2 teaspoon ground black pepper
In a large mixing bowl combine together all of the above ingredients in the order they are given in the recipe until well combined. Cover the bowl and refrigerate for 2 to 6 hours to allow the flavors to infuse. Remove and serve chilled with your favorite snacks.
Friday, October 4, 2013
Delicious Homemade Taco Dip Recipe
We eat a lot of Mexican food or Mexican inspired food here in our home and it's one of our favorite cuisines. Often times preparing Mexican style food can be a time consuming process, so when I find a quick and easy recipe for a delicious tasting appetizer, I file the recipe into my favorites and make it often.
This taco dip can be used several different ways once you have it prepared. We like to serve it with nachos, tortilla chips, as a dip for burritos, as a veggie dip...etc. However you want to use it...that is up to you.
Homemade Taco Dip Recipe
8 oz. package cream cheese, softened
7 oz. can chili
3 or 4 oz. can chopped chilies (chili peppers)
1 small green onion, finely chopped
8 oz. block sharp cheddar cheese, grated
Let cream cheese stand at room temperature for 10 minutes. Spread the cream cheese in a thin layer in the bottom of a pie pan. Spread the chili over the top and then spread the chopped chilies & onion on top of that...making layers as you go along. Finally...sprinkle the grated sharp cheddar cheese on top.
Preheat oven to 350 degrees F. Place pie pan in the oven and bake for 10 to 13 minutes. Remove and let stand for 15 minutes before serving. All leftovers should be refrigerated and will keep up to 3 full days in the refrigerator.
Wednesday, September 25, 2013
Old El Paso - Weeknight Mexican Dinner Night + Giveaway
One of the brands I turn to for that authentic Mexican taste happens to be Old El Paso. At any given time you will find at least 5 Old Paso products here in my home. We enjoy eating fish tacos, beef tacos, burritos, nachos, enchiladas, quesadillas and more! This is one cuisine that my entire family enjoys!
Recently I was sent a gift pack of Old El Paso products to review for all of you. For this review we decided to create our own Mexican family dinner night and enjoyed soft-shelled beef & bean tacos and some homemade beef & green chile enchiladas. You can grab the recipes directly from the Old El Paso site.
One of the things I really love about the Old El Paso products is that I can get in and out of the kitchen on a weeknight in less than 35 to 45 minutes flat! That includes preparation time and cook time! During these nights of the week I just don't have 2 hours to prepare an entire meal from scratch. Old El Paso makes it quick & easy to get dinner on the table for a hungry family of four!
My family LOVED both of the items I served for our Mexican Food family night! I love how easy everything was to prepare and they got plenty of healthy veggies in their diets. Sigh, I wish we would of had some left-overs but sadly...they ate every last bite! I guess that attests to how great the food was!
Giveaway: One lucky winner is going to win an Old El Paso gift pack! One winner will receive a rectangular serving tray, a round divided serving tray, a pack of flour tortillas, a can of refried beans, $10 Walmart Gift Card and a can of enchilada sauce. YAY! Now you can have your own family Mexican night too!
Giveaway Details: This giveaway is open to residents of the USA ONLY who are age 18 and over. Please read the Terms of Service and Disclaimer Policy before entering. You must be a PUBLIC FOLLOWER of this Blog to have your entries count in my giveaways. (Follow via Google Friend Connect) All non-blog followers will have their entries disqualified after the giveaway closes. This giveaway will close on October 14th, 2013 at midnight EST time.
Tuesday, August 27, 2013
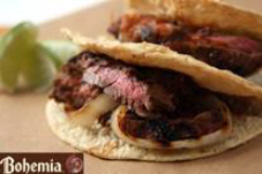
Bohemia’s Grilled Skirt Steak Tacos Recipe
Grilled Skirt Steak Tacos with Salsa and Bohemia
· 1 to 1 1/4 pounds trimmed beef skirt steak
· 1 jar (16 ounces) Frontera Chipotle Salsa or Frontera Roasted Tomato Salsa
· ½ cup Bohemia beer
· 3 garlic cloves, peeled and crushed
· 3 tablespoons fresh lime juice
· ¼ teaspoon ground cumin
· Salt
· 2 medium white onions, sliced into ½-inch rounds
· Vegetable oil
· Chopped fresh cilantro, lime wedges
· 12 fresh, warm tortillas
Instructions:
1. Cut steak into 4- or 5-inch portions. Mix 1/2 cup of the salsa, the beer, garlic, lime juice, cumin and ½ teaspoon salt in a large zippered bag. Add the steak. Close the bag tightly and turn gently to coat the steak. Refrigerate 1 hour or up to 8 hours.
2. Heat a gas grill to medium-high or light a charcoal fire. Brush or spray the onion slices with vegetable oil. Grill onions over a cooler section of the grill, turning carefully until softened and browned, about 10 minutes. Transfer to a serving dish.
3. Remove the steak from the marinade (discard the marinade). Oil the steak well on both sides, and lay it over the hottest part of the grill. Grill, turning once, until richly browned and done to your liking, about 1 ½ to 2 minutes per side for medium-rare.
4. Cut skirt steak across the grain into thin strips. Mix with the onions, season with a little salt. Serve steak and onions with the remaining Frontera salsa, cilantro, lime wedges and hot tortillas, for making into soft tacos.
Disclosure: Recipe and photo is courtesy of Bohemia Beer. I have received no monetary compensation for this post and just passing on the recipe to the SNB Foodie Blog readers.
Wednesday, July 17, 2013
Old El Paso Makes My Nights Easier
Use your fresh vegetables and herbs to add variety to your mexican night. Bring your tacos, enchiladas and quesadillas up a notch with Old El Paso®. Visit OldElPaso.com to find lots more recipes. Farmer’s Market fresh produce and Old El Paso® -- When You Gotta Have Mexican™!
For this review I received a complimentary Farmer's Market Old El Paso gift package from MyBlogSpark and Old El Paso to make a dinner for my family using most of the products included in the kit, plus some additional products that I picked up at my local Farmer's Market here in Harrisburg.
Included in My Kit:
◾Market basket
◾Avocado keeper
◾Chopper with storage bowls
◾Old El Paso® Taco & Fajita Tortillas
◾Old El Paso® Traditional Refried Beans
◾Old El Paso® Taco Seasoning
At the market I purchased some organic fresh boneless chicken breasts, 2 green bell peppers, 2 large tomatoes. 1 avocado and a large onion. Gosh...I love buying fresh produce at this time of year from my local farmers...don't you? Anyway, once back home we got everything ready for family Fajita night.
If you are looking to save time in the kitchen and looking for easy-to-prepare dinner ideas, Old El Paso has got you covered! They make a wide variety of food products and dinner kits that will leave your family wanting more! You can also find some tasty Mexican recipes on their web site, so make sure you head on over there to grab some free recipes today while you are here.
Closed! Winner is Jennifer T. and Jennifer has been notified! Thanks!!!
Disclaimer: Shelly Hill has personally reviewed the product listed above. Shelly has not received any monetary compensation for her review. Shelly did receive a free product to try out so she could evaluate and use it for her review. Her thoughts & opinions in this review are unbiased & honest and your opinions may differ. The Shakin N Bakin Blog is not responsible for delivery/shipping of giveaway items won from this blog nor are we responsible for mis-use or injury caused by items won from this Blog. Content on this blog is copyrighted, all rights reserved. We reserve the right to legally pursue anyone who violates our rights and/or steals our copyrighted material.


