Welcome To The Shakin 'N Bakin Blog!
Welcome to my blog! I love to cook and bake for my family. I hope you enjoy the recipes, foodie reviews, foodie giveaways and cooking tips posted on my blog.
How to Print Recipes: You can print out each individual recipe featured on this blog by clicking the "share" button at the bottom of each post. It will open up to show you options, click on print and another window will open up with the recipe inside it for printing. You can also use the SHARE button to email a copy of the recipe to yourself for printing later.
Friday, April 28, 2017
Sloppy Joe's Stuffed in Pretzel Dough
You can find all kinds of great homemade soft pretzels recipes on the web (we like the one on the Food Network) or you can purchase a pre-packaged mix at your local grocery store if you want to save time. We prefer whipping it up from scratch, which always tastes better.
We make our Sloppy Joe's from scratch using lean ground beef, finely chopped onions, chopped green bell pepper, Italian tomato sauce, brown sugar, basil and a tad of salt & ground black pepper. I don't measure out my ingredients and just toss things in until I like the taste. If you prefer your's with a little kick, you can toss in some hot sauce to add some heat.
While your Sloppy Joe filling is simmering on low heat...you'll want to mix up your soft pretzel dough according to package directions. If you're making it from scratch, you'll have to make the dough earlier in the day to allow sufficient time for rising and kneading.
Preheat the oven to 350 degrees F. Lightly spray a baking dish with non-stick baking spray.
Separate your prepared dough into equal proportions and flatten down each section. Spoon the prepared filling into the center of the dough and then wrap the dough up around your filling to encase it inside. Melt a little bit of butter in your microwave and then brush the tops with the melted butter and sprinkle the pretzel salt on top.
Place baking dish into the oven and bake for 10-12 minutes or until done. Remove and let them sit in the pan for additional 2-3 minutes before serving. If desired, you can toss some shredded cheese on top, right after you remove them from the oven. If adding the cheese, you want them nice & hot so that the cheese melts before serving.
Sunday, October 23, 2016
Green Pepper and Rice Soup Recipe - Slow Cooker
When it comes to serving it...some of my family members enjoy it with melted shredded cheese on top, while others enjoy it served plain. In addition, I sometimes serve it with toasted cheesy garlic bread or with cornbread on the side. Both are equally good served with this soup. The recipe is super versatile and you can spice it up to your own liking! If you have a small garlic bulb on hand, you can mince that up and toss it in with your doing the meat mixture portion of the recipe.
Slow Cooker Unstuffed Green Pepper Soup Recipe
1 lb. lean ground beef
2 to 3 cups uncooked white rice
1 - 32 oz. jar spaghetti sauce
1-2 cups of water
3 green bell peppers, chopped
1 onion, finely chopped
24-36 cherry tomatoes, sliced in half
1 1/2 tbsp. basil
1 tbsp. parsley
1 1/2 tbsp. oregano
1/2 tsp. red pepper flakes
salt and ground black pepper to taste
In the slow cooker, combine together your cooked hamburger & veggie mixture with the 32 oz. jar of spaghetti sauce. Stir in the basil, parsley, red pepper flakes and oregano. If you want to add salt & ground black pepper to it, you can do it now or let people add their own when you serve it. Turn the heat up to high and cook for 1 hour on high. While it's cooking prepare the white rice.
Follow directions on the package to cook your white rice. Once done, drain away the water. Stir the white rice into the mixture that is in the slow cooker and add at least 1 cup of water, more if the mixture is too thick. Cover and reduce the heat to low.
Slow cook the green pepper soup on the low heat setting for about 2 hours. If you're not ready to sit down and eat, reduce the heat setting to warm until you're ready to serve it.
Sunday, September 18, 2016
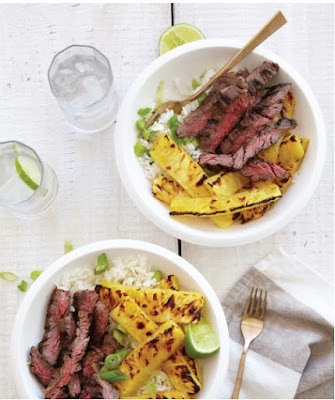
The Big Island Steak Bowl Recipe
Fear not! The Terra's Kitchen Big Island Steak Bowl recipe provides easy, step-by-step instruction with indoor grilling , so you can perfect this gourmet specialty at home. This recipe makes 2 servings and each serving contains 560 calories. It's an excellent source of fiber, protein, vitamin C and iron.
Terra's Kitchen The Big Island Steak Bowl
1 Lime
10 oz Skirt Steak
20 oz Pineapple Spears
2.25 oz Sliced Scallion
5 oz Jasmine Rice
1 teaspoon Soy Sauce
.3 oz Sesame Oil
.2 ox Brown Sugar
¼ teaspoon Crushed Red Pepper
2 teaspoons Canola Oil
Kosher or Flake Sea Salt
Baking Sheet
Foil
Microzester or Zester
Chef's Knife
Small Saucepan with Lid
Liquid Measure
Measuring Spoons
Brush
Grill Pan
Small Mixing Bowl
Tongs
Preheat oven to broil. Line a baking sheet with foil and set aside. Zest half the lime. Cut lime in half. In a small saucepan over high heat, bring 1 and ¼ cups water and ¼ teaspoon salt to a boil. Stir in rice and return to a boil. Reduce heat to low, cover and simmer 15 minutes. Turn off heat and let sit, covered for 5 minutes. Fluff with a fork and gently stir in sesame oil, zest, juice from half a lime, all except 1 tablespoon of the scallions. Cover and set aside.
While cooking rice, place pineapple in a single layer on a foil lined baking sheet and brush tops with 1 teaspoon oil. Lightly sprinkle with salt. Broil until charred in places (about 15 minutes). Remove pineapple from oven and sprinkle with the remaining brown sugar and as much of the red pepper flake as you can handle. Set aside.
Rub a grill pan with 1 teaspoon of canola oil and place over high heat. In a small bowl, combine half of the soy sauce, half of the brown sugar and ½ teaspoon salt and ¼ teaspoon pepper. Rub mixture over steak. When grill starts to smoke, add steaks and cook to medium rare, turning once (3-4 minutes per side). Remove to a plate and allow to rest for 5 minutes. Thinly slice against the grain.
To Serve: Divide rice and pineapple between two bowls. Top with sliced steak. Squeeze lime juice over and garnish with remaining scallion and crushed red pepper (optional).
Wine Pairing: Pineapples are a bear to pair. You can't go wrong with a dry German Riesling.
Beer Pairing: This cool salad bowl calls for a cool beer! Serve up a smoked bock beer like Aecht Schlenkerla Rauchbier Urbock.
Wednesday, September 14, 2016
Easy Baked Ziti Recipe
Once I ready to start dinner, I will cook up the ziti pasta and while it's cooking, I'll reheat the lean ground beef in my microwave for about 45 seconds, just long enough to warm it up, so it's not being added into the recipe cold. Once the pasta has been cooked, your baking time is approximately 20-30 minutes. So, you can get this meal onto the table in less than 45 minutes if you prepare the ground beef ahead of time.
Easy Baked Ziti Recipe
18 ounces ziti pasta, cooked and drained
32 ounces Italian spaghetti sauce
1 lb. lean ground beef, cooked and drained
1/2 cup Parmesan cheese
4 cups Italian Cheese Blend, shredded
Salt and Ground Black Pepper to Taste
1/4 Teaspoon Red Pepper Flakes
Preheat oven to 350 degrees F.
Cook the ziti pasta until done. Drain away the water. Mix the cooked pasta, Italian spaghetti sauce, cooked lean ground beef, Parmesan cheese, salt, ground black pepper, red pepper flakes and the 2 cups of the Italian cheese blend in a large mixing bowl. Pour mixture into a glass rectangular baking dish. Sprinkle the remaining 2 cups of cheese on top.
Place baking dish in a preheated oven and bake for 20 to 30 minutes or until done. The cheese will be melted and bubbly on top. Remove from oven and let it sit for an additional 2-3 minutes before serving.
When we make Baked Ziti, we like to serve it with a homemade garden salad and some garlic bread. Sometimes we will slice some fresh tomatoes and place the slices on top of the garlic bread along with some shredded cheese and bake it in the oven while the ziti is baking. It really adds a nice flavor to the garlic bread! If desired, you can sprinkle some fresh basil on top of the garlic bread too!
Monday, April 18, 2016
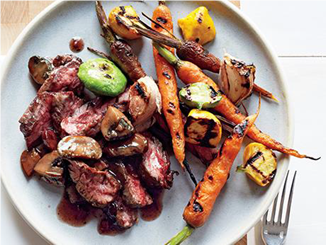
Carrot Stuffed Bison Tenderloin Recipe
Today's guest post recipe is courtesy of Chef Anthony Stuart, Executive Chef at Pritikin Longevity Center + Spa. For those of you who measure out your portions, serving size is 4 oz.
Carrot Stuffed Bison Tenderloin Recipe
1 whole grass-fed bison tenderloin (cleaned and ends remove)
2 whole carrots peeled and shaved down and blanche
2T Pritikin all purpose seasoning
2T salt free lemon pepper
2T ground coriander
Place a roasting pan in the oven at 400 degrees to pre-heat. Combine all purpose, lemon pepper and coriander and season tenderloin. Insert a boning knife in the center of tenderloin lengthwise and turn making a hole. Repeat from the other end. Insert the whole carrots into the center incisions making sure the carrots meet in the center.
Blueberry Balsamic Reduction Recipe
2 cups blueberries
1 cup balsamic vinegar
In a sauce pan combine blueberries and balsamic and bring to a boil. Reduce flame and let simmer for 10 minutes. Cool and blend. Serve with bison.
Disclosure: Recipe and photograph were used with permission.
Saturday, February 27, 2016
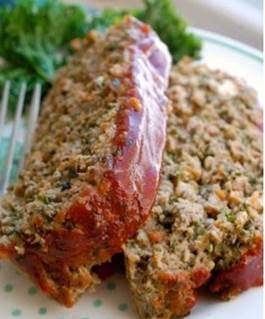
Delicious Homemade Meat Loaf Recipe
One of my favorite recipes to use is this one that I got from my great aunt about 15 years ago. This recipe will make 6 servings.
Delicious Homemade Meat Loaf Recipe
1 1/2 lbs. lean ground beef
1/2 cup ketchup
1/2 cup tomato sauce
1/2 tsp. salt
1/2 tsp. ground black pepper
1/4 tsp. red pepper flakes
2 large eggs, lightly beaten
3/4 cup fine seasoned bread crumbs
1/8 cup finely chopped onions
2 tsp. prepared mustard
1 tbsp. oregano
Topping:
1/4 cup ketchup
1/2 tsp. mustard
2 tbsp. light brown sugar
In a large mixing bowl combine together all of the above ingredients except those listed for the topping, until they are well combined. Press meat mixture into a loaf baking pan. In a small mixing bowl combine together the topping ingredients and then pour them over the top of the meat mixture.
Preheat oven to 350 degrees F. Place loaf pan into a hot oven and bake for approximately 30 to 40 minutes or until done. Remove and serve immediately.
Saturday, December 26, 2015
Slow Cooker Sweet and Sour Meatballs Recipe
Today I am going to share with all of you my favorite recipe for Crockpot Sweet & Sour Meatballs. When I make this recipe I buy bags of the fully cooked beef meatballs at my local dollar discount store. Yes, you read that right, the dollar store! They sell 12 oz. bags of fully cooked & seasoned beef meatballs for $1.00 per bag!
Slow Cooker Sweet and Sour Meatballs Recipe
10 oz. jar sweet and sour sauce
1⁄4 cup packed light brown sugar
3 Tbsp. soy sauce
1/4 tsp. salt
1⁄2 tsp. ground black pepper
2 1⁄2 lbs. frozen beef meatballs (fully cooked
1/4 to 1/2 cup green bell pepper, finely chopped
20 ounce can pineapple chunks, drained
Place the lid on the slow cooker and turn the heat up to the HIGH setting for one hour. Reduce heat to the low setting for 4-6 hours or until done. Once done...you can use the warm setting to keep them warm while serving them at a party or enjoy them right away. Refrigerate any leftovers and reheat in your microwave oven on 50% power until they are heated through.
Note: I find that this freezes well too! I will often make big batches and freeze it for later use. I let it cool completely and then spoon everything into a freezer-safe plastic container (make sure you spoon a lot of the sauce into the container) and FREEZE for up to 3 months. Thaw in the refrigerator overnight and reheat right before serving time.
Monday, May 4, 2015
Slow Cooker Beef Vegetable Soup Recipe
I love using my slow cooker and probably use it 3 times a week to make various lunch and dinner recipes. During the weekends I like to use it to make desserts. One of my favorite things to make in my slow cooker happens to be a good old-fashioned vegetable soup but instead of using a beef roast, I use ground beef and I add a little pasta to it to make it hearty.
This veggie soup is delicious and you can really tailor it to suit your own taste buds. Sometimes when I have fresh cabbage available from our garden, I will shred some of that up and toss into the mixture while it is cooking. In addition, it freezes really well for future meals. Enjoy!
1 lb. lean ground beef, browned, grease drained
1 large bag frozen, thawed mixed vegetables
6 cups V-8 tomato juice
4 cups cooked, drained pasta shells
1/4 cup diced green peppers
1/4 cup diced sweet onion
2 beef bouillon cubes, dissolved in 1 cup hot water
1/2 cup chopped red tomatoes
1 tablespoon basil
1 tablespoon parsley
1 teaspoon salt
3/4 teaspoon ground black pepper
Brown the ground beef in a large skillet along with the diced onions and green peppers. Drain grease and dump into the bottom of your slow cooker. Add in the thawed mixed vegetables, V-8 tomato juice, cooked & drained pasta shells, beef broth, chopped tomatoes, basil, parsley, salt and ground black pepper. If needed you can add additional tomato juice, water or beef broth to your liking.
Cover and cook on the high setting for 1 hour. Reduce heat and simmer on the low setting for 3-4 hours. If you are not ready to eat, turn the heat down to just the "warm" setting until serving time.
Posted by
ShellyH
at
5:30 AM
1 comments
![]()
Labels: Beef Recipes, Crock Pot Recipes, Soups and Stews, Vegetables
Saturday, May 2, 2015
Manwich Loaded Baked Potato Recipe
These Manwich Loaded Baked Potatoes are delicious as a side dish or all on their own for lunch. We like making them and serving them along side a great garden salad. Here is how you can make them.
Manwich Loaded Baked Potato Recipe
1 lb. Lean Ground Beef
1 can Original Manwich
1 can Pork 'n Style Beans
Sour Cream
Butter
Salt and Ground Black Pepper
Brown your lean ground beef and drain away the grease. Stir in one can of Manwich and 1 can of Pork 'n Style Beans or a can of Baked Beans (whatever you prefer). Turn the heat down to low and simmer for 8 to 10 minutes.
While that is simmer microwave your russet potatoes until they are done. Remove from microwave, slit them open and top with sour cream or butter; sprinkle on salt and ground black pepper to taste. Spoon the Manwich filling on top of the potato and enjoy!
Monday, March 23, 2015
SCHMACON Smoked & Cured Glazed Beef Slices #WhatruSchmacon
Well guess what? There is a new alternative and it's a bacon made from beef called SCHMACON! This new product has less calories, fat & sodium when compared to your traditional pork bacon. It has a bold flavor from unique, deli-inspired spices and has a wonderful taste and texture. Not only that, it has minimal shrinkage when you cook it up!
SCHMACON was the recipient of the 2014 Food & Beverage Innovations Award that was presented by the National Restaurant Association. The quality starts with carefully-trimmed, whole muscle beef with no fillers added. It has a smoky but yet sweet taste to it and while it's similar to traditional bacon, it does have a unique flavorful taste.
The SCHMACON can be crisped up on the stove-top, in the oven, on a grill or even in your microwave. It can be eaten alone or use it as an ingredient in one of your favorite recipes. Very easy to use...just crisp and serve! An added bonus is that it "cooks" (crisps) in less time than a traditional pork-made bacon which means you get it onto the table, faster.
Watching your weight? Pork bacon that has been pan-fried contains about 84 calories per 18g serving. Schmacon (uncrisped) contains 45 calories so it's great for anyone who is counting calories and trying to lose weight. Watching your sodium? Pork bacon that was pan-fried contains 303mg of sodium whereas Schmacon has only 180mgs. A definite win-win!
For my family...we crisped it up in the microwave (only took a minute or two) and made ourselves some BLT's for lunch the other day. We toasted up our bread, added some mayo, tomato slices, SCHMACON and lettuce. Oh my gosh...they were delicious! You could tell that it wasn't traditional pork bacon but it was in a good way! Those sandwiches were better than ever thanks to the smokey, sweet & bold flavor of the SCHMACON!
You can buy SCHMACON now and it will be hitting store shelves throughout the year. In the meantime, they have a Kickstarter campaign that started on March 9th, 2015 and now you can get the product shipped to your door. By choosing to be a backer in this campaign, you can choose a reward of not only packs of the SCHMACON, but logo coffee mugs, t-shirts and gourmet dinners! They also have some fabulous early-bird specials running right now too!
You can visit the SCHMACON website to learn more and check them out on Facebook, Twitter and on Pinterest for some cool recipe ideas.
Disclaimer: Shelly H. has personally reviewed the product listed above. Shelly has not received any monetary compensation for her review. Shelly did receive a free product to try out so she could evaluate and use it for her review. Her thoughts & opinions in this review are unbiased & honest and your opinions may differ. The Shakin N Bakin Blog is not responsible for delivery/shipping of giveaway items won from this blog nor are we responsible for mis-use or injury caused by items won from this Blog. Content on this blog is copyrighted, all rights reserved. We reserve the right to legally pursue anyone who violates our rights and/or steals our copyrighted material.
Monday, March 2, 2015
Mustard Sauce for Corned Beef Recipe
St. Patrick's Day is less than two weeks away and I am already thinking about the great Irish cuisine that we will enjoy on St. Patty's Day. Even though my husband and I are not Irish, we do enjoy some traditional Irish cuisine and we do have fun on St. Patty's Day.
Today I am sharing an easy-to-prepare mustard sauce recipe with all of you from Colman's Mustard. Once you have it prepared you can use it with your traditional corned beef and hash. It's look delicious and I am going to give it a try myself. What do you typically make and enjoy on St. Patrick's Day? Looking for more great recipes? Check out Colman's site online!
5/8 cup water (in which corn beef has been boiled)
5/8 cup vinegar
4 teaspoons Colman’s Dry Mustard Powder
1 egg
4 teaspoons sugar
Mix the egg, mustard and sugar together. Add the vinegar and beef liquid. Heat gently without boiling. Serve hot or cold with hot or cold corned beef.
Sunday, December 7, 2014
Colman's Classic Meatloaf Recipe
I like to make a good meatloaf dinner for my family every month. When I make meatloaf, I always double up my recipe and make a large batch so that I can freeze some for later use. One recipe that I like to use when I make this delicious dinner is the Colman's Classic Meatloaf Recipe.
Before freezing, you want to let your meatloaf completely cool. I then like to slice my loaves in-half since it is just hubby and I and freeze the halves in food storage bags. We then have future dinners and lunches already available. We thaw in the refrigerator and then can reheat in our oven or microwave. When my daughter is here...she doesn't reheat and enjoys cold meatloaf sandwiches. Here is the recipe.
2 lb. ground beef
2 eggs, lightly beaten
1 medium onion, finely chopped
2 T. Worcestershire sauce, plus one teaspoon
1 ½ tsp. Colman’s Dry Mustard Powder
½ tsp. freshly ground pepper
1 C. seasoned bread crumbs
¾ C. beef broth
1 T. olive oil
¼ C. ketchup
Preheat oven to 350 degrees.
In a large bowl, combine beef, eggs, onion, 2 T. Worcestershire sauce, Colman’s Dry Mustard Powder, pepper and bread crumbs. Mix well until all ingredients are incorporated. With well-washed hands add beef broth to mixture and knead until fully blended. Oil the inside of the loaf pan and add meat mixture, patting until evenly distributed. In a small bowl, mix ketchup and 1 tsp. Worcestershire sauce. Spread on top of meatloaf. Bake for 45-55 minutes.
Disclosure: The recipe and photo is courtesy of Colman's. You can visit their web site to find additional recipes and product information.
Sunday, September 7, 2014
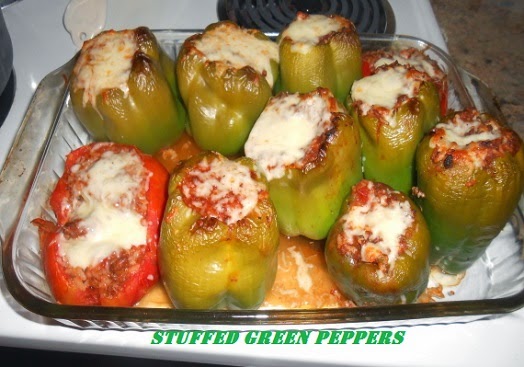
Homemade Stuffed Green Peppers Recipe
We planted a big garden this year and surprisingly, everything did well. Matter of fact, we had an abundance of green bell peppers! I ended up freezing some for later use and I also made up several batches of homemade stuffed green peppers and froze them too. Here is how we make ours.
You can use this same recipe when stuffing large red or green tomatoes too! Plus, if you let them cool completely, you can freeze them in containers for later use. I keep mine for 4 to 5 months in the freezer.
6 to 8 large green bell peppers
1 lb. lean ground beef
1/8 cup finely chopped onion
1 small can diced tomatoes with juice
1 medium can tomato sauce
2 cups uncooked white rice
1 tablespoon basil
1/2 teaspoon parsley
1 teaspoon oregano
1/4 teaspoon salt
1/4 teaspoon ground black pepper
1/2 cup shredded cheese (your favorite)
Wash bell peppers, remove stem & seeds, set aside. Cook up the white rice until almost done. It should be el dente. Drain away water and set aside.
In a large frying pan simmer the lean ground beef with the finely chopped onion over medium heat until beef is done. Drain away grease, set aside. In a large mixing bowl combine together all of the above ingredients EXCEPT for the shredded cheese. Spoon filling into the shells of the green bell peppers or into the shells of large tomatoes.
Preheat oven to 350 degrees. Place peppers and/or tomatoes into a large baking dish and bake in the oven for 25 minutes. Remove. Top each pepper or tomato with shredded cheese. Place baking dish back into the oven for 3 to 5 minutes to melt cheese. Remove and serve immediately.
Thursday, July 3, 2014
Gorgonzola & Sun-Dried Tomato Stuffed Burger Recipe
Tomorrow is the July 4th holiday and many of us will be attending some type of party or hosting one at our own homes. I love to celebrate our nation's independence and it is a great time to get together with all of our family and friends.
This July, as our country celebrates the 238th anniversary of the Declaration of Independence's adoption, the most iconic English mustard is celebrating its 200th birthday. Just 38 years after the signing of America's most distinguished document served to mark the founding of our country, Colman's Mustard was born.
Along with the celebration of our country's rich history comes fireworks, baseball and, of course, barbecues. Colman's Mustard is the perfect way to spice up classic Independence Day recipes. Sold as prepared mustard and mustard powder, Colman's unique blend of high-quality brown and white mustard seeds makes anything that's pulled off the barbecue a taste sensation.
3 lbs ground beef
1 cup minced sun-dried tomato
4 oz crumbled Gorgonzola cheese
1/2 cup minced chives
2 T steak sauce
1/3 t. hot sauce
2 t Worcestershire sauce
1 t black pepper
1.5 t salt
2 heaping teaspoons of Colman's dry mustard
12 hamburger buns
In a large bowl, mix the ground beef, sun-dried tomatoes, Gorgonzola, chives, steak sauce, hot pepper sauce, Worcestershire sauce, black pepper, salt, and mustard. Cover and refrigerate for two hours. Separate into 12 equal patties. Grill to perfection.
To Print: You can print out this recipe by clicking on the SHARE button located at the bottom of this post. A new window will open, click on PRINT and the recipe will load in for quick printing.
Friday, June 27, 2014
Grilled Cabernet Steaks Recipe
Steak is one of those meats that we enjoy eating at least twice a week. If we could afford to eat it every day, we probably would! To keep things interesting around our house we are always looking for a new beef recipes to try out. If you want your steaks to be moist and flavorful...you will want to purchase the best cuts that you can afford. Cheaper is not best!
Here is a great recipe for all of you to enjoy. Recipe and photo is courtesy of Friends Fun Wine.
· 1/2 cup Friends Fun Wine ® Cabernet Coffee Espresso™
· 6 skirt steaks or rib eye steaks, 4 ounces each
· Vegetable oil cooking spray
· 2 tablespoons olive oil, divided
· 1/2 pound French or regular carrots
· 1/4 pound baby summer squash, halved
· 1/4 pound pearl onions, peeled and halved
· 1/4 pound brussel sprouts, halved
· 8 ounces cremini mushrooms
· 4 ounces Portobello mushrooms
· 4 ounces button mushrooms
· 1 medium white onion, diced
· 2 tablespoons chopped garlic
· 24 ounces low-sodium beef broth
· 1 ounce fresh basil
· 2 tablespoons Nutmeg
1. Season steaks with salt and nutmeg.
2. On a grill pan coated with cooking spray, cook steaks over medium-high heat, turning once, until pink inside, 3 to 4 minutes per side.
3. Remove from heat and cover with foil. In a bowl, toss carrots, squash, pearl onions and sprouts in 1/2 tablespoon oil.
4. Over medium heat, in batches and turning once, cook until soft and seared, 6 minutes.
5. In a large pan over medium heat, heat remaining 1 1/2 tablespoons oil. Slice mushrooms; to pan, add mushrooms, white onion and garlic; cook until onion browns, 5 to 7 minutes.
6. Add Friends Fun Wine® Cabernet Coffee Espresso™ and simmer 3 to 5 minutes.
7. Add broth and bring to a boil.
8. Reduce heat and slowly add cornstarch mixture to broth mixture, stirring constantly, until sauce is thick enough to coat the back of a spoon.
9. Add fresh basil, salt and nutmeg; simmer 7 to 10 minutes.
10. Slice steak, top with mushroom sauce; serve alongside vegetables.
To Print Recipe: Click on the share button located at the bottom of this post. A new window will open. Then click on PRINT and the recipe will load into the window for printing.
Thursday, May 29, 2014
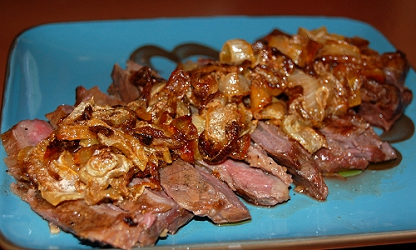
Grilled Skirt Steak with Caramelized Vidalia Onions Recipe
Father's day is just around the corner and for many of us we will be planning a special day for Dad. If the holiday you are planning includes a backyard barbecue then you should try out this recipe from the great folks over at Cookina and professional chef George Duran.
I don't know about all of you...but my husband LOVES grilled steak and this is definitely a recipe that we have got to try. Too bad we will be out of town & on vacation for Father's Day, but once we get back, it is definitely on our list! Thanks for the recipe Cookina!
Grilled Skirt Steak with Caramelized Vidalia Onions Recipe
2 8oz. skirt steaks
1 large Vidalia onion, slices
1 tsp. granulated sugar
1 tbsp. olive oil
Salt and pepper
Pat filet mignon steaks dry with a paper towel and season generously with salt and pepper. Set aside and pre-heat grill on medium-high heat. In a medium bowl mix slices of onion with sugar, olive oil and 1 tsp salt. Place COOKINA Barbecue Reusable Grilling Sheet on the grill and cook onions for 6-8 minutes until they begin to caramelize. Add steaks next to onions on COOKINA Barbecue sheet and cook on each side to your liking (about 3-4 minutes on each side for medium rare, depending on the thickness). Serve steaks and onions together.
To Print Recipe: Click on the SHARE button located at the bottom of this post. A new window will open. Click on PRINT and the recipe will load into the window for printing. Enjoy!
Saturday, May 24, 2014
Hard Rock Cafe Fiesta Burger Recipe
The great folks over at the Hard Rock Cafe sent over this recipe for their famous Fiesta Burger.
* Prep beforehand - form your burger patties, cut vegetables and make dips and sauces before guests arrive.
* For the best bun, use a fresh bun and lightly butter it before toasting on the grill.
* Start with a high quality meat and get creative by using fresh vegetables and good cheeses as toppings, like the Hard Rock Fiesta Burger.
Hard Rock Fiesta Burger Recipe
8 oz. Beef Burger
1 tsp Seasoning Salt
2 Tbsp. Jalapeno Salsa
2 slices Monterey Jack Cheese
Hamburger Bun
1 Tbsp. Fresh Guacamole
1 Tbsp. Pico de Gallo
2 leaves Iceberg Lettuce
1 slice Tomato
Preparation: Shake half of seasoning on burger and place season side down on broiler, shake remaining seasoning over burger. Cook to desired temperature. After cooking, spread jalapeno salsa over the patty and place cheese slices. Top with iceberg lettuce, tomato, guacamole and pico de gallo.
The grill should be in the 550 degree range to sear meat well - the time it takes to cook will depend on the temperature of the grill and thickness of the burger. You can flip the burger a few times, but no more than three. Don’t press the burger to make it cook faster because you want the juices to seal in.
Disclaimer: The recipe and photo is courtesy of Hard Rock Cafe. You can print out this recipe by clicking on the share button located at the bottom of this post. A new window will open, click on print and the recipe will load into the window for printing. Enjoy!
Saturday, May 17, 2014
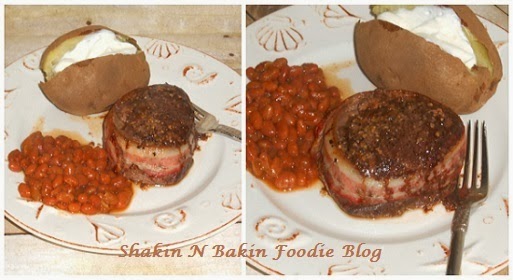
Bacon Wrapped Filet Mignon Steak Recipe
Bacon Wrapped Filet Mignon Recipe
filet mignon steaks
extra-virgin olive oil
sliced bacon
salt
ground black pepper
McCormick steak seasoning
Brush your steak with extra-virgin olive oil and then season both sides of your steak with some salt, ground black pepper and McCormick steak seasoning. Place them in a dish, cover and refrigerate for a few hours. Remove. Wrap one slice of bacon around the outside perimeter on each one. You won't have to secure the bacon at all, but wrap it tightly.
You can bake them in a 350 degree oven for approximately 25 minutes, flipping them halfway through the cooking cycle or toss them onto a hot grill and grilling them until done. We like ours medium-well so it takes about 25 minutes for them to cook through for us. That's it! Easy and delicious!
Saturday, April 26, 2014
Grilled Montreal Beef Steaks Recipe
By brushing your steaks with a light coating of the extra-virgin olive oil you are helping your seasoning to stick to the meat plus...it keeps your steaks from getting dried out during the grilling or baking process. Hubby "swears" that the olive oil does the trick! We do this with any beef cut that we may be grilling. Try it with your prime rib, t-bone, filet mignon, etc.
Montreal Beef Steaks Recipe
thick cut beef steaks
extra-virgin olive oil
McCormick Grill Mates Montreal Steak Seasoning
Brush each side of the beef steaks with a light coating of the extra-virgin olive oil. Sprinkle as much or as little of the McCormick Grill Mates Montreal Steak Seasoning on each side. Let steaks sit for 5 minutes before tossing them onto the grill.
You will want to grill each side about 7 to 8 minutes or until your steaks are done. I like mine medium-well so it takes a little longer. Hubby likes his rare-medium. Remove and serve immediately.
Monday, April 7, 2014
Homemade Italian Meatballs Recipe
Here is the recipe that I use when I am making up a large batch of homemade Italian Meatballs which are perfect for when you make a spaghetti & meatballs dinner.
Italian Meatballs Recipe
2 1/2 lbs. lean ground beef
10-12 saltine crackers, crushed
3 large eggs, lightly beaten
1/2 teaspoon salt
1/4 teaspoon ground black pepper
1 tablespoon oregano
1 teaspoon parsley
2 teaspoons basil
1/4 cup tomato sauce
In a large mixing bowl mix together all of the ingredients except the lean ground beef. Use your hands and rip a part the ground beef and toss it into the bowl. Use your hands to mix all of the ingredients together with the meat until well blended. Use your hands and make round 1 1/2" diameter balls. I find that larger balls take way too long to cook up.
Place the meatballs in a large skillet and simmer over low heat, stirring often to prevent sticking and to make sure all sides of them brown evenly. Once they are done remove from the skillet and place them onto a plate that is lined with several paper towels to drain away the excess grease.
You can now toss them into your spaghetti sauce and simmer them on low heat with the sauce for 10 to 12 minutes or until done. If you want to freeze them...let them cool completely, toss into freezer containers or bags and freeze for up to 4 months.
Note: You can print out this recipe by clicking on the "share" button located at the bottom of this post. Once you click on the button, find the PRINT button and the recipe will load into a new window for printing.


