Welcome To The Shakin 'N Bakin Blog!

Welcome to my blog! I love to cook and bake for my family. I hope you enjoy the recipes, foodie reviews, foodie giveaways and cooking tips posted on my blog.

How to Print Recipes: You can print out each individual recipe featured on this blog by clicking the "share" button at the bottom of each post. It will open up to show you options, click on print and another window will open up with the recipe inside it for printing. You can also use the SHARE button to email a copy of the recipe to yourself for printing later.

Showing posts with label Bars and Cookies. Show all posts

Wednesday, April 22, 2015

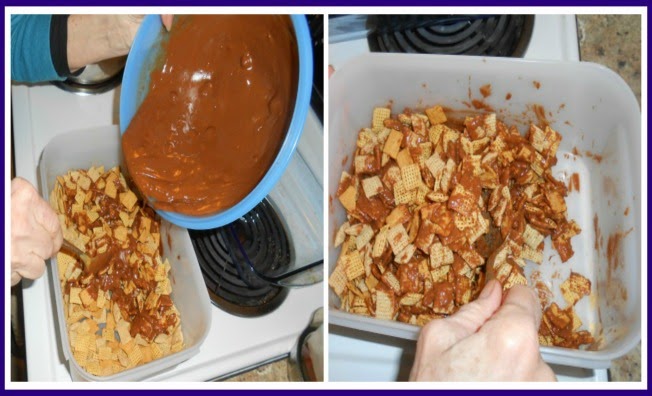
Chex Muddy Buddies Snack Mix Recipe

We love the Chex brand of cereals and have been eating them for years. A few years ago when they released their Chex Muddy Buddies Snack Mix Recipe, I knew I had to make it and now it has become a family favorite! I bet I make this recipe at least once every 6-8 weeks and both the kids and adults just love it!

Note: When I make this recipe I use 3 cups of each of the 3 different flavors of Chex cereal listed below. In addition, I sometimes toss in some miniature marshmallows or M&M's candies too. My sister likes to break up small hard pretzel sticks and toss them into her batch when she makes it so get creative and toss in whatever your kids like.

Chex Muddy Buddies Snack Mix Recipe

9 cups Rice Chex, Corn Chex or Chocolate Chex Cereal
1 cup Semisweet Chocolate Chips
1/2 cup Smooth Peanut Butter
1/4 cup Butter or Margarine
1 teaspoon Vanilla Extract
1 1/2 cups Confectioner's (powdered) Sugar

In a large mixing bowl measure out your 9 cups of Chex cereal. You will need a very large mixing bowl so make sure you plan out appropriately.

In a medium microwave-safe bowl, microwave the chocolate chips, peanut butter and butter, uncovered on HIGH for 1 minute; stir. Microwave about 30 seconds longer or until mixture has thoroughly melted and is smooth. Stir in the vanilla extract until combined. Pour this mixture over the top of the cereal mix, stirring until all of the cereal is well-coated in the chocolate mixture.

Pour the Confectioner's sugar into the bowl and stir until all of the cereal is coated lightly with the powdered sugar. You can also toss everything into a large 2-gallon plastic food storage bag and shake it all together but I find it easier to do in a large mixing bowl.

Once everything is mixed together store in an airtight bowl, snack canister or in food storage bags.

Thursday, December 11, 2014

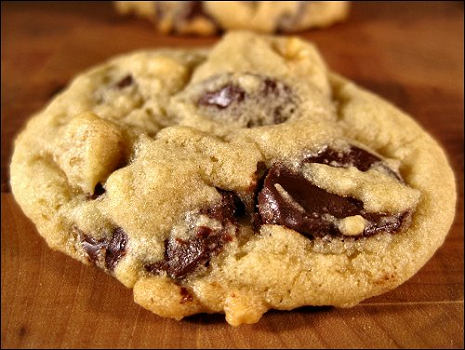
Chewy Chocolate Chip Cookies Recipe

One of my absolute favorite cookies happens to be the Chocolate Chip but I am very picky about which recipe that I use. I like my cookies very chewy and I like them loaded with a lot of semi-sweet chocolate chips. The recipe I am sharing with all of you today is my favorite recipe when I make them.

I like to whip up 2 batches of cookie dough at the same time. I then split the dough in half and freeze one half in a freezer bag for later use. That's right, you can freeze your cookie dough for up to two months. Thaw and then bake as normal.

Chewy Chocolate Chip Cookies Recipe

2 1/4 cups all purpose flour
1 teaspoon baking soda
1/2 teaspoon salt
1 cup butter, softened (not margarine)
3/4 cup granulated sugar
3/4 cup brown sugar
1 1/2 teaspoons vanilla extract
2 large eggs
1 bag (12 ounce) semi-sweet chocolate chips

Preheat oven to 350 degrees F.

In a medium sized mixing bowl, combine first 3 ingredients and set aside. In a large mixing bowl, cream the softened butter and sugars together until fluffy. Add vanilla extract and the large eggs. Beat well. Sift dry ingredients together and then mix into the creamed mixture. Mix together well. Stir in the semi-sweet chocolate chips by hand. Take heaping tablespoons of dough and roll into a ball. Place each ball 2" apart on an ungreased cookie sheet. Bake for 8-10 minutes. Remove cookies from oven, place on cooling rack. Store in an airtight canister. Makes approximately 3 1/2 dozen of cookies.

Tuesday, November 25, 2014

Limited Edition Cookie Sandwiches from LANCE

This year for the first time ever, Lance has launched their NEW line of Seasonal Favorites cookie sandwiches - on shelves this month, just in time for the Holidays! Combining their best-selling cookies with the most popular seasonal filling flavors, new Lance® Seasonal favorites are a delicious additional to the tasty line-up of Lance®snacks.

The NEW Lance Seasonal Favorites come in three delectable flavors that include:

* Chocolate Nekot® Cookies with Mint Filling
* Nekot® Cookies with Pumpkin Cheesecake Filling
* Sprinkled Sugar Cookies with Sweet Creme Filling

The company sent me one box of each of the three new flavors and I was super excited to test them out! All of these snacks are preservative free!

The Nekot® Cookies with Pumpkin Cheesecake Filling were my absolute favorite out of the three. They are very flavorful and taste like a pumpkin cheesecake with some crunch! Very full-filling! Just perfect...a snack and a dessert all wrapped into one.

The Sprinkled Sugar Cookies with Sweet Creme Filling were my second favorites. I love how festive they look and trust me, they taste just like a crunchy sugar cookie! This particular flavor was my 5 1/2 year old grand daughter's favorite! She took the remaining 5 packs from me to carry to school.

Now for the final one. The Chocolate Nekot® Cookies with Mint Filling were my husband's favorites! He said these remind him of those famous "GS Cookies" but in his opinion, better because they are more full-filling and he loves the crunch. I thought they were good too and they reminded me of a chocolate peppermint patty.

All three are delicious! I am hoping that Lance does this on a regular basis. I would love to see some new limited edition flavors in the Spring and then again next Fall. Yes...please LANCE...bring us more!

Disclaimer: Shelly Hill has personally reviewed the product listed above. Shelly has not received any monetary compensation for her review. Shelly did receive a free product to try out so she could evaluate and use it for her review. Her thoughts & opinions in this review are unbiased & honest and your opinions may differ. The Shakin N Bakin Blog is not responsible for delivery/shipping of giveaway items won from this blog nor are we responsible for mis-use or injury caused by items won from this Blog. Content on this blog is copyrighted, all rights reserved. We reserve the right to legally pursue anyone who violates our rights and/or steals our copyrighted material.

Monday, November 10, 2014

Chocolate Oatmeal Raisin Cookies Recipe

We love homemade peanut butter cookies and oatmeal raisin cookies but what we love even more is this particular recipe where they are combined together. Sometimes oatmeal cookies on their own come out very dry...but with the addition of the peanut butter in this recipe they come out smoother and moist.

This recipe makes A LOT of cookies! I freeze at least half of them once I have them baked and cooled. They will keep in the freezer for up to 3 months.

Chocolate Oatmeal Raisin Cookies Recipe

6 cups oatmeal
4 cups granulated sugar
1/2 lb. butter, softened
1/2 teaspoon salt
1/2 cup raisins
1 cup milk
3/4 cup cocoa powder
1 1/2 cups smooth peanut butter
1 teaspoon vanilla extract

In a large mixing bowl combine together the softened butter, granulated sugar, milk, cocoa powder and the salt. Stir in the smooth peanut butter, oatmeal, raisins and the vanilla extract.

Preheat oven to 350 degrees F. Drop batter onto an ungreased cookie sheet and bake for 8 to 11 minutes or until cookies are done. Remove from oven and let cool.

Note: You can print out this recipe by clicking on the "share" button located at the bottom of this post. Once you click on the button, find the PRINT button and the recipe will load into a new window for printing.

Thursday, October 16, 2014

Cookbook Review: Best of Bridge Holiday Classics

I love to cook but I am really passionate about baking. Over the years I have amassed quite the collection of cookbooks and one of my favorite cookbook publishes ~ Robert Rose sent me one to review. This is a fabulous cookbook for the upcoming holiday season.


Title: Best of Bridge Holiday Classics
Publisher: Robert Rose
ISBN: 9780778804871

Synopsis: This new collection will meet all of your holiday entertaining needs, from casual potluck get-togethers to festive brunches, and buffets to elegant sit-down dinners and cocktail parties. It's all here ~ from Christmas morning Wife Saver and Sumptuous Spinach & Artichoke Dip to Old-Fashioned Butter Tarts. The Food Gifts & Leftovers chapters take the edge off holiday planning.

The cookbook has 225 recipes for special occasions. I love that it has a spiral bound and a hardcover so it will lay flat on your counter when you are using it. The foodie photography in this cookbook is really festive look and it makes you want to try out that recipe right away.

Examples of Recipes in the Book:

* Christmas Morning Wife-Saver
* Midnight French Toast
* Cranberry Scones
* Nippy Cheddar Rabbit
* Brie with Sundried Tomatoes
* Eggnog Supreme
* Senate Salad Bowl
* Classic French Onion Soup
* Roast Turkey with Sage Bread Stuffing
* Fruit & Nut Shortbread
* Chocolate Raspberry Torte
* Pumpkin Cheesecake
* Crazy Crunch
* Christmas Marmalade
* Plus many more!!!

The printing is what I call a "medium to large" print which makes it very easy on the eyes when you are reading the recipes. I appreciate that because my eyesight is not as good as it used to be. I love that everything is organized nicely by chapters and almost all of the recipes call for everyday ingredients that you can find readily available. Instructions/directions are given for each recipe and they are presented in a very easy & understandable format.

After looking through the book, I have already decided that come New Year's Eve when the family is here for our annual party, I am going to make the Best Seafood Lasagna recipe on page 114. I think it's going to be a real winner along with the Hot Artichoke Dip on page 56.

This cookbook has something for everyone and I personally think that many of the recipes will quickly become family favorites!

You can find the Best of Bridge Holiday Classics Cookbook at Robert Rose, as well as various other cookbooks that they have to offer. I highly recommend them!

Disclaimer: Shelly Hill has personally reviewed the product listed above. Shelly has not received any monetary compensation for her review. Shelly did receive a free product to try out so she could evaluate and use it for her review. Her thoughts & opinions in this review are unbiased & honest and your opinions may differ. The Shakin N Bakin Blog is not responsible for delivery/shipping of giveaway items won from this blog nor are we responsible for mis-use or injury caused by items won from this Blog. Content on this blog is copyrighted, all rights reserved. We reserve the right to legally pursue anyone who violates our rights and/or steals our copyrighted material.

Thursday, October 9, 2014

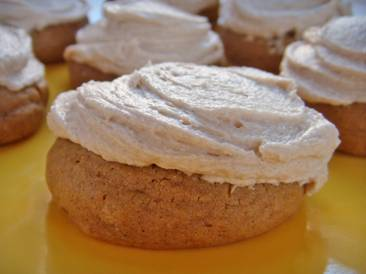
Pumpkin Spice Cookies Recipe

I love this time of year. You can find all kinds of tasty pumpkin treats like bars, cookies, pies, cakes, cupcakes, bread and ice cream. YUMMY! Now I am hungry! Every year I look forward to baking up a batch of pumpkin flavored cookies and today's recipe is courtesy of Cookina.

Pumpkin Spice Cookies Recipe

1 package of cream cheese (8 ounces)
1 ½ cups packed brown sugar
½ cup sugar
2 eggs
1 cup canned pumpkin
1 teaspoon vanilla extract
3 ½ cups all-purpose flour
1 ½ teaspoons pumpkin pie spice
1 teaspoon baking soda
1 teaspoon salt
½ teaspoon baking powder

Frosting:

2 cups confectioners' sugar
¼ cup butter, melted
1 teaspoon vanilla extract
2 -3 tablespoons boiling water
2 cups chopped pecans (optional)

In a large bowl, beat the cream cheese and sugars until smooth and mixed. Add eggs (one at a time) mixing well after each. Beat in pumpkin and vanilla. Combine dry ingredients; gradually add to pumpkin mixture and mix well. Place your COOKINA Cuisine on your cooking sheet and drop rounded teaspoons of batter about two inches apart. Bake at 350 degress for 10-12 minutes or until golden brown. For frosting, in a small bowl, combine the confectioners' sugar, butter, vanilla and enough water to achieve frosting consistency. Frost cookies (once they have cooled) and sprinkle pecans if desired.

Thursday, September 25, 2014

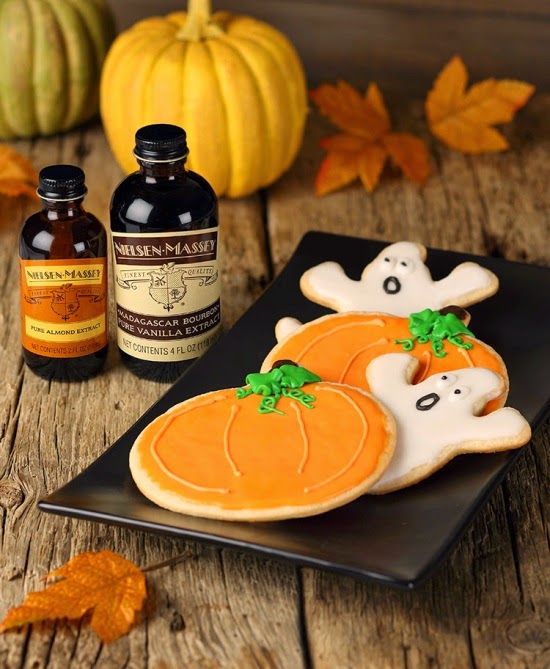
Halloween Almond Sugar Cookies Recipe

Halloween is a little over a month away and already we are Halloween items and food every where! It seems we see this stuff earlier and earlier every year. I don't mind it in September but back in July/August every store already had their Fall Harvest items out front for shoppers to buy.

This year I will be really busy baking up some Halloween treats for an upcoming party that we will be hosting. This recipe was sent over to me today and looks delicious + easy to make! Enjoy!


Today's recipe is courtesy of: Nielsen-Massy. The recipe will yield approximately 3 dozen cooks.

As fall decorations and jack-o’-lanterns begin to grace the doorsteps of homes across America, frequent visits to costume and party stores are in order as Halloween approaches.

“Halloween was once known by the Celts as a day to bridge to the world of the dead, but is now associated with merriment and fun,” says Craig Nielsen, CEO of Nielsen-Massey Vanillas, Inc. “We at Nielsen-Massey see the holiday as a time for adults and children alike to take on new personas at costume parties and indulge in sweet treats for the evening, including the “spooktacular” cookie recipe.”

Embrace the holiday spirit and let Nielsen-Massey Vanillas assist you in planning every aspect of your Halloween celebrations by baking versatile Spooktacular Almond Sugar Cookies.

Spooktacular Almond Sugar Cookies Recipe

3 cups all-purpose flour
2 teaspoons baking powder
¾ teaspoon salt
1 cup (2 sticks) unsalted butter, softened
1 cup superfine sugar (purchase or process granulated sugar for about 20 seconds in a food processor)
2 tablespoons heavy whipping cream
3¼ teaspoons Nielsen-Massey Madagascar Bourbon Pure Vanilla Extract
½ teaspoon Nielsen-Massey Pure Almond Extract
2 eggs
¼ cup confectioners’ sugar (for dusting work surface)
¼ cup all-purpose flour (for dusting work surface)

Position oven rack in the center of oven and preheat to 350⁰F. Line two large, heavy light-colored baking sheets with parchment paper; set aside. In a medium bowl, whisk flour, baking powder and salt until blended; set aside.

In a large mixing bowl, add butter, sugar, cream, vanilla and almond extracts; beat with a handheld mixer on medium speed until fluffy, about 2 minutes, scraping sides of bowl as needed. Reduce speed to medium-low; add eggs one at a time and beat after each addition. Using a rubber spatula, fold in the dry ingredients one half at a time.

Divide dough into two even pieces, press each piece into a disk shape, wrap tightly with plastic wrap and refrigerate for about 1 hour. Dough should be cool and firm but easy to work with.

In a small bowl, whisk confectioners’ sugar and flour until blended; set aside. Working with one piece of dough at a time, place on a clean, dusted surface. Roll dough to about ⅛-inch thickness. Use cookie cutters to cut shapes and transfer with a thin offset metal spatula to prepared cookie sheets. For even baking, do not overcrowd cookies. Gather remaining dough, cover with plastic and chill. Continue with second chilled dough.

For best results, bake one sheet pan at a time until done, about 10 minutes; remove and place cookies on wire racks to cool. Decorate and store in an airtight container.

Almond Glaze and Almond Piping Icing Recipe

1¼ cups confectioners’ sugar
1 tablespoon meringue powder
2 tablespoons water
½ teaspoon Nielsen-Massey Pure Almond Extract (may substitute with Nielsen-Massey Madagascar Bourbon Pure Vanilla Extract)
variety gel food colors

In a small bowl, whisk together sugar and meringue powder. Add water and almond extract, stir until smooth. Glaze cookies in desired colors and set aside to dry before piping. For the piping icing, remake the glaze recipe and add additional confectioners’ sugar, one tablespoon at a time until desired consistency is reached. Divide icing into small bowls; add desired gel colors. Select pastry tips, prepare pastry bags and creatively pipe icing onto glazed cookies.

About Nielsen-Massey Vanillas: Throughout its more than 100 year history, Nielsen-Massey Vanillas has earned its reputation as a manufacturer of the finest extracts in the world. The full line of Nielsen-Massey’s Pure Vanilla products include: Vanilla Beans and Extracts from Madagascar, Tahiti and Mexico; sugar and alcohol-free Madagascar Bourbon Pure Vanilla Powder; Madagascar Bourbon Pure Vanilla Bean Paste; Madagascar Bourbon Pure Vanilla Sugar, Organic Fairtrade Madagascar Bourbon Pure Vanilla Extract and Organic Madagascar Bourbon Pure Vanilla Beans.

Nielsen-Massey Vanillas also offers a full line of Pure Flavors: Pure Chocolate Extract, Pure Almond Extract, Pure Orange Extract, Pure Lemon Extract, Pure Coffee Extract, Pure Peppermint Extract, Orange Blossom Water and Rose Water. All Nielsen-Massey products are All-Natural, Allergen-Free, and certified Kosher and Gluten-Free. The company is headquartered in Waukegan, Illinois, with production facilities in Waukegan and Leeuwarden, The Netherlands.

To Print Recipe: Click on the SHARE button located at the bottom of this post. A new window will open and the recipe will load into the window. Click on PRINT and your done!

Saturday, September 20, 2014

Easy Raspberry Hugs Chocolate Chip Cookies Recipe

A few months ago I bought a few bags of those Hershey's Hugs Raspberry Flavored Kisses and immediately fell in-love with them. They are the perfect combination of white chocolate with a tad of raspberry flavoring. Sweet, but not overly sweet!

Last week I decided to use some of those delicious tasting Hershey's Kisses in one of my favorite chocolate chip cookies recipes. Here is how I made my own cookies that your family is going to love!

If you are pressed for time, you can do it the "cheater" way by purchasing refrigerated chocolate chip cookie dough & just press one unwrapped kiss into the top of each cookie while it is still hot from the oven.


Raspberry Hugs Chocolate Chip Cookies Recipe

36 Unwrapped Hershey's Hugs Raspberry Flavored White Creme Kisses

1/2 cup butter, softened
1/2 cup vegetable shortening
1 cup granulated sugar
1 large egg
1 teaspoon vanilla extract
2 1/4 cups all-purpose flour
1 teaspoon baking powder
1/4 teaspoon salt
1/2 cup semi-sweet chocolate chips

Preheat oven to 350 degrees F. In a large mixing bowl beat together the softened butter, vegetable shortening and granulated sugar until well blended. It should be creamy in it's consistency. Using an electric mixer, beat in the large egg and vanilla extract.

In a separate mixing bowl sift together the all-purpose flour, baking powder and salt. Gradually beat this mixture into the first bowl until all ingredients are well-combined. Stir in the semi-sweet chocolate chips until they are well mixed into the cookie batter.

Drop cookie dough onto an ungreased baking sheet and bake for 8 to 10 minutes or until lightly browned. Remove from oven. While cookies are sitting on the baking sheet, press one unwrapped Hershey's Kiss into the center of each cookie. Let them cool on the sheet. Store baked cookies in an airtight container. Enjoy!

To Print: You can print out this recipe by clicking on the SHARE button at the bottom of this post. A new window will open. Click on the PRINT and the recipe will load into the window for printing.

Monday, August 18, 2014

Gooey Chewy Chocolate Chip Cookies Recipe

With the first day of school right around the corner it's time to get ready for all the after-school snacks. Nothing screams the perfect after-school snack like George Duran's recipe for Gooey Chewy Chocolate Chip Cookies courtesy of COOKINA. This super delicious, recipe leave you with three dozen of the softest and gooiest chocolate chip cookies that will be sure to fill all those hungry mouths on play dates. The kids won't be able to stop themselves from indulging in these cookies which will allow you to enjoy a few minutes of peace and quiet.


Gooey Chewy Chocolate Chip Cookies Recipe
by George Duran
Yields: 3 dozen cookies

Ingredients:

2 ¼ C. all purpose flour
2 tsp. cornstarch
1 tsp. baking soda
1 C. unsalted butter, softened
3/4 c. brown sugar
1/4 c. granulated sugar
1/2 tsp. salt
2 tsp. vanilla extract
1 egg
1 C. mini chocolate chips

Directions:

Preheat oven to 350 degrees F.

In a small bowl, whisk together the flour, corn starch and baking soda, set aside. In the bowl of an electric mixer fitted with the paddle attachment, combine the butter with both sugars. Beat on medium speed until light and fluffy. Add salt, vanilla and egg until just combined. Gently fold in dry ingredients and finally chocolate chips. Drop tablespoon-size balls of dough about 2 inches apart on baking sheets lined with COOKINA® Cuisine.
Bake 8-10 minutes until it just starts to brown and place on a wire rack to cook for at least 5 minutes before serving.

The COOKINA Cuisine Reusable Cooking Sheet is an innovative product that creates a nonstick, easy-to-clean and healthy cooking & baking experience. Ideal for using as an alternative to aluminum foil, parchment and wax paper, users can place the cooking sheet on a baking tray or pan to bake recipes without having to use oil of needing to clean the tray and oven afterwards. $12.99 / for more information, visit www.cookina.co.

Saturday, August 9, 2014

Homemade Chocolate Fudge Brownies Recipe

Last week my husband was craving chocolate brownies so I got busy going through my family cookbooks and found this recipe for homemade chocolate fudge brownies. When it comes to brownies, we like ours more on the fudgy side than the cake-like side which can often times be too dry. Here is the recipe that I used.

Note: Once they have been baked and are cool, you can lightly dust them with some confectioner's sugar if desired.

Homemade Chocolate Fudge Brownies Recipe

1/2 cup butter, softened
2 squares unsweetened chocolate
1 cup granulated sugar
2 large eggs, lightly beaten
3/4 teaspoon vanilla extract
1/2 cup + 2 tablespoons all-purpose flour

In a large saucepan melt together the butter and unsweetened chocolate over low heat for 2-3 minutes, stirring constantly. Once it has been melted and is smooth, remove from heat and let stand for 5 minutes (off the burner).

Once the 5 minutes have passed, stir int he granulated sugar until sugar has melted and the ingredients are combined. Lightly stir in the eggs and vanilla extract, gently stirring until combined. Blend in the all-purpose flour using a rubber spatula or spoon, keep stirring until batter is smooth and combined.

Lightly grease an 8" by 8" baking pan with some butter or spray it with nonstick cooking spray (lightly). Pour brownie batter into the pan. Preheat oven to 350 degrees F. and bake for 20 to 22 minutes or until done. Remove and let them cool in the pan. Once cool, cut them into squares and place the squares into an airtight storage container.

How to Print Recipe: At the bottom of the post is a share button. Click on button to see options and then click on PRINT. A new window will open with the recipe inside it for printing purposes. Enjoy!

Monday, July 28, 2014

No-Bake Chocolate Cow Pies Cookies Recipe

Last weekend I made a batch of these No-Bake Chocolate Cow Pies Cookies and the family devoured them quickly. I love no-bake cookie recipes especially at this time of the year when it is too hot in our home to be heating up the oven to make cookies. These cookies are really easy-to-prepare and taste delicious! I am not sure why they call them cow pies though! (hubby thinks it is because it looks like cow do-do).

No-Bake Chocolate Cow Pies Cookies Recipe

2 cups semi-sweet milk chocolate chips
1 tablespoon vegetable shortening
1/2 cup raisins
1/2 cup slivered almonds, chopped

Line a baking sheet with waxed paper or parchment paper. You will be dropping the prepared cookies onto the prepared baking sheets to firm up.

Using a double boiler, melt the semi-sweet chocolate chips and vegetable shortening over hot water until creamy and smooth. You will need to constantly stir the mixture to prevent scorching. Remove pan from the heat and stir in the raisins and chopped almonds until they are blended into the chocolate mixture.

Use a large tablespoon and drop the cookie batter onto your prepared baking sheets in 2" diameter piles. Once the baking sheet is filled, place it into the refrigerator so that the cookies firm up. Once firm, remove them and place them into an airtight container or cookie jar for storage.

Note: You can print this recipe by clicking on the SHARE button at the bottom of this post. A new window will open up. Click on the PRINT button and the recipe will load into the window. Then print it out! 

Sunday, July 6, 2014

Easy Chocolate Cherry Cookies Recipe

I love quick and easy baking recipes that don't take hours to make. I got this super easy cookie recipe from my sister a few months ago...we just love making them! You will only need four ingredients to make them and only one large mixing bowl. No fuss cookies!

Easy Chocolate Cherry Cookies Recipe

1 roll Pillsbury Sugar Cookie Refrigerated Dough
1/4 cup cocoa powder
6 Tablespoons cherry juice
confectioner's sugar for dusting

Tip: You can use regular bottled 100% cherry juice or drain some juice from a jar of maraschino cherries.

Preheat oven to 350 degrees F.

Remove roll of refrigerated sugar cookie dough from refrigerator and allow it to stand at room temperature for 20 minutes. It will be easier to work with once you let it come to room temperature for a few minutes. Tear it a part into smaller pieces.

Place cookie dough pieces, cocoa powder and cherry juice into a large mixing bowl. Blend the three ingredients together. The batter will be stiff, so use your hands if possible and do the best you can with the blending process. You can add a little more cherry juice if necessary.

Roll the cookie dough into 2 1/2" round balls. Place them onto a lightly greased baking sheet about 3" a part. They will expand during the baking process. Bake in the oven for 7 to 9 minutes or until done. Remove and let them cool on a wire rack. Once they are cool, dust the tops with a little bit of confectioner's sugar. Store cookies in an airtight container.

Wednesday, April 16, 2014

Pecan Sandies Cookies Recipe

Last week we had some chilly Spring weather so I decided to bake up a batch of pecan sandies cookies for my family. I got this delicious cookie recipe about 15 years ago from my mother-in-law and have been making it ever since. This recipe will make 32 to 36 cookies.

Pecan Sandies Cookies Recipe

1 cup butter or margarine, softened
1/4 cup granulated sugar
2 tsp. vanilla extract
2 cups all-purpose flour
1 cup chopped pecans
1/4 cup powdered sugar (confectioner's sugar)

In a large mixing bowl beat together the granulated sugar with the softened butter until light and fluffy. Stir in the vanilla extract until blended. Stir in the all-purpose flour along with the chopped pecans. Beat and stir all ingredients until well blended together.

Shape the cookie dough into 1" balls. Place the balls onto an ungreased baking sheet. Preheat oven to 350 degrees F. Place baking sheets into the oven and bake for 13 to 16 minutes or until the cookies are done. Remove from oven and let cool completely. Once they are cool, dust them lightly with confectioner's sugar. Store in an airtight container.

Note: You can print out this recipe by clicking on the "share" button located at the bottom of this post. Once you click on the button, find the PRINT button and the recipe will load into a new window for printing.

Thursday, March 27, 2014

Mom's Homemade Congo Cookie Bars Recipe

When my brother and I were both little kids my mother used to make us these bar-style cookies called Congo Cookies. Most people that I talk to have never heard of them but trust me, it is a vintage recipe and those of us who are older recognize them from our past.

Homemade Congo Cookie Bars Recipe

1 lb. brown sugar
2/3 cup vegetable shortening
3 large eggs
1 teaspoon vanilla extract
2 3/4 cup all purpose flour
2 1/2 teaspoons baking powder
1/2 teaspoon salt
1/2 cup chopped nuts
3/4 cup chocolate chips

In a large mixing bowl cream together the brown sugar, vegetable shortening, large eggs and vanilla extract. In a separate mixing bowl sift together the all purpose flour, baking powder and salt. Gradually add the flour mixture into the wet mixture stirring well after each addition until all ingredients are well combined. Fold in the chopped nuts and the chocolate chips until well blended.

Lightly spray a square baking dish with nonstick baking spray. Pour batter into the baking dish, smoothing it out so it is even. Place dish into a 350 degree preheated oven and bake for 14 to 16 minutes or until done. Remove from oven and let cool in the pan for 10 minutes and then cut them into squares.

Note: You can print out this recipe by clicking on the "share" button located at the bottom of this post. Once you click on the button, find the PRINT button and the recipe will load into a new window for printing.

Sunday, March 2, 2014

JOLLY TIME Cocoa Popcorn Crunch Recipe

We love popcorn and make a big batch of it every week. Sometimes we get bored having the same old thing so a few weeks ago I found the JOLLY TIME Cocoa Popcorn Crunch Recipe online and just had to make it! You can go on over to the JOLLY TIME web site and find all kinds of great recipes that utilize their delicious popcorn!

This recipe has quickly become one of our favorites and the kids just love it! Sometimes we toss in a handful of chopped peanuts, chopped pecans or some mini marshmallows into the popcorn before pouring the chocolate over the top. It is super delicious!

JOLLY TIME Cocoa Popcorn Crunch Recipe

3 cups granulated sugar
1/2 cup unsweetened cocoa powder
1 cup milk
2 tablespoons vanilla extract
6 quarts of popped popcorn

Pop 6 quarts of JOLLY TIME popcorn and set aside. Line your counter top with waxed paper or foil, I use foil personally as I am not a fan of waxed paper. In a medium saucepan combine together the granulated sugar, cocoa powder, milk and the vanilla extract. Boil for 3 minutes or until a candy thermometer reaches 250 degrees. (note: I don't use the candy thermometer but found if I boil for 3 minutes it works out perfectly). You will need to stir the mixture constantly while it is boiling.

Pour the hot cocoa mixture over the popped popcorn that you have sitting in a large bowl. It will be hot so be careful. Use a spoon to stir the mixture together until the popcorn is completely coated. Spread the mixture onto the foil lined counter top or baking sheet. Use a spoon or spatula to flatten it out. Let it cool to firm up. Once cool & firm, break it a part into smaller pieces and place into a container for storage.

Note: You can print out this recipe by clicking on the "share" button located at the bottom of this post. Once you click on the button, find the PRINT button and the recipe will load into a new window for printing.

Tuesday, February 18, 2014

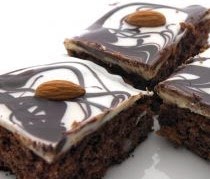
Marbled Cream Cheese Brownie Squares Recipe

I love brownies and I love them made in all kinds of different ways! I will eat chocolate brownies, cream cheese brownies and even blondies when the opportunity presents itself. When I am looking for a decadent and fancy brownie to serve at one of my family gatherings, I love to make this recipe for marbled cream cheese brownie squares.

Marbled Cream Cheese Brownie Squares Recipe

3/4 cup butter, softened
4 squares unsweetened chocolate
1 1/2 cups granulated sugar
3 large eggs
1 tablespoon milk
1 cup all-purpose flour
8 oz. block cream cheese, softened
1/4 cup granulated sugar
1 large egg
2 tablespoons all-purpose flour

Preheat oven to 350 degrees F. Lightly grease a 10" square baking dish or brownie pan.

In a large mixing bowl beat together the softened cream cheese and the granulated sugar until smooth and creamy. Beat in the large egg and blend in the 2 tablespoons of all-purpose flour. Set aside.

In a large saucepan over low heat melt the butter and the chocolate squares until creamy. Remove from heat and let cool for 3 minutes. Beat in the granulated sugar and the large eggs until well blended. Stir in the milk and then blend in the 1 cup of all-purpose flour.

Spread half of the brownie batter into the base of your prepared baking dish. Spread the cream cheese mixture over the top, running a knife through it to give it that marbled look. Pour the remaining chocolate brownie over the top, run knife through the batter & layers again to give it that marbled look.

Place baking dish into the preheated 350 degree oven and bake for 30 to 33 minutes or until done. Remove and let cool on a wire rack before cutting them into squares. Store squares in an airtight container.

Optional: You can place a sliced almond or a half of a pecan on top of each square for an elegant presentation.

How to Print Recipe: At the bottom of the post is a share button. Click on button to see options and then click on PRINT. A new window will open with the recipe inside it for printing purposes. Enjoy!

Saturday, January 25, 2014

Peanut Butter M&M;'s Cookies Recipe

I love baking cookies and often times I put my own twist on them. A few weeks ago I took my favorite peanut butter cookies recipe and added in M&M's which turned out great! My daughter, grand daughter and god son ate them right up & even asked me to make more.

This recipe takes about 12 minutes to prepare, 12 to 15 minutes of baking time per cookie sheet and will make approximately 2 1/2 dozen cookies.

Peanut Butter M&M's Cookies Recipe

1 cup all-purpose flour
1 teaspoon baking soda
1/2 teaspoon salt
1/2 cup vegetable shortening
1/2 cup granulated sugar
1/2 cup brown sugar, firmly packed
1 large egg
1/2 cup smooth peanut butter (not chunky)
1/4 teaspoon vanilla extract
1/2 to 3/4 cup M&M's candies

Preheat oven to 350 degrees F. Lightly spray baking sheets (cookie sheets) with non-stick cooking spray.

In a large mixing bowl sift together the all-purpose flour, baking soda and salt. In another large mixing bowl cream together the vegetable shortening, granulated sugar and brown sugar until combined and creamy. Beat in the large egg until combined. Stir in the creamy peanut butter and vanilla extract. Gradually beat the flour mixture into the wet mixture, beating after each addition until all ingredients are well combined. Fold in the M&M's candies.

Drop cookies onto a prepared baking sheet with a rounded tablespoon, leaving 2 1/2" between each cookie. Place baking sheet into the preheated oven and bake for 12 to 15 minutes or until done. Remove and transfer cookies to a wire rack to cool. Store cookies in an airtight container.

Note: You can print out this recipe by clicking on the "share" button located at the bottom of this post. Once you click on the button, find the PRINT button and the recipe will load into a new window for printing.

Friday, January 17, 2014

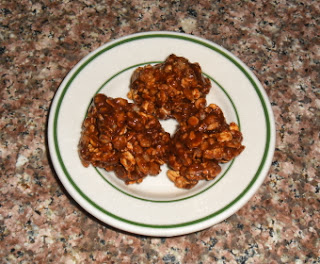
No-Bake Chocolate Granola Cookies Recipe

I love baking cookies for my family but on some busy weeks I turn to stove-top (no-bake cookies) recipes to save time. I enjoy making no-bake cookies even more during the hot summer months when I don't want to heat up the house by using an oven.

These No-Bake Chocolate Granola Cookies are really easy-to-prepare and you only need a handful of ingredients to make them. The recipe will make about 2 1/2 dozen round cookies.

No-Bake Chocolate Granola Cookies

No-Bake Chocolate Granola Cookies Recipe

Parchment Paper
1 bag (6 oz.) mini marshmallows
1/4 cup butter, softened
1/2 cup smooth peanut butter
4 cups granola cereal
1 cup milk chocolate chips

Tip: Pour the granola cereal into a bowl and mash it up with a potato masher to make smaller clumps. I do this because we don't like big hard clumps in our cookies.

Lay the parchment paper out on your counter. You will be dropping your cookies onto it once they are prepared so that they firm up and don't stick.

In a large saucepan combine together the softened butter and the mini marshmallows over low heat, stirring constantly so that they both melt and blend together. Remove from heat and stir in the smooth peanut butter until blended. Pour in half of the granola cereal, stir and then pour in the other half, stir again. Pour in the chocolate chips, stirring everything until melted and blended together. You need to work quickly so that the cookie mixture isn't hardening up.

Use a tablespoon and drop the cookies onto the parchment paper, spacing them about 1" a part. They do not expand so you can pretty much crowd them together. Let them firm up at room temperature or place them onto a tray and refrigerate until firm. Store cookies in an airtight container.

Note: You can print out this recipe by clicking on the "share" button located at the bottom of this post. Once you click on the button, find the PRINT button and the recipe will load into a new window for printing.

Sunday, December 22, 2013

Hershey's Chocolate Chip Cookies Recipe

I love baking cookies and bake cookies all year long. However, during this time of the season I really go nuts in my kitchen and do an abundance of cookie baking. Just last week I made 5 batches of these Hershey's Chocolate Chip Cookies! I kept one batch for us and gave the rest away to family and friends. By far...this is one of my favorite chocolate chip cookie recipes!

This recipe will yield 7 to 8 dozen cookies depending on how large you make them.

Hershey's Chocolate Chip Cookies Recipe

1 cup butter-flavored shortening
1 1/4 cup brown sugar
3/4 cup granulated sugar
1 teaspoon vanilla extract
2 large eggs
2 1/4 cups unsifted all-purpose flour
1 teaspoon baking soda
1 teaspoon salt
4 cups Hershey's chocolate chips

Cream together the shortening, brown sugar and vanilla extract in a large mixing bowl. Beat the eggs in a separate bowl and then add them to the mixture. Mix together the all-purpose flour, baking soda and salt in a separate bowl and gradually add to the wet ingredients in the first bowl. Stir in the chocolate chips by hand until well blended into the cookie batter.

Preheat oven to 325 degrees F. Drop the batter by well-rounded teaspoonfuls onto a greased cookie sheet. Place sheet into the oven and bake for 8 minutes or until barely brown. Remove from oven and let cool. Store them in an airtight container.

Note: To print out this recipe click on the share button at the bottom of this post. A new window will open and then click print. Enjoy!

Thursday, December 19, 2013

Chewy Oatmeal Chocolate Chip Cookies Recipe

Now that the holiday season is here I have been spending a lot of time in my kitchen making & baking a wide variety of Christmas cookies for my family. My adult daughter loves oatmeal chocolate chip cookies so a few days ago I baked a large batch of them just for her. These cookies are "chewy" and not the brick hard oatmeal cookies that some recipes make. I also like the addition of the ground cinnamon in this recipe which adds extra flavor.

This recipe requires approximately 12 minutes of prep time and each batch takes 10-12 minutes of baking time. The recipe will make approximately 3 1/2 dozen cookies.

Chewy Oatmeal Chocolate Chip Cookies Recipe

1 cup all-purpose flour
1 teaspoon baking powder
1/2 teaspoon salt
1/2 teaspoon ground cinnamon
3/4 cup vegetable shortening
1 cup light brown sugar, firmly packed
2 large eggs, lightly beaten
1 teaspoon vanilla extract
1/3 cup milk, divided
3 cups old-fashioned rolled oats (oatmeal)
1 cup semi-sweet chocolate chips

* Preheat oven to 350 degrees F.

In a large mixing bowl sift together the all-purpose flour, baking powder, salt and ground cinnamon. Cut-in the vegetable shortening until mixture is well combined and crumbly. Stir in the light brown sugar, lightly beaten large eggs, vanilla extract and half of the milk until all ingredients are well-combined. In a separate large bowl combine together the remaining milk with the rolled oats (oatmeal). Let stand at room temperature for two minutes. Pour this mixture into the first bowl, stirring to combine everything together. Use a spoon and fold in the semi-sweet chocolate chips.

Spray a baking sheet with non-stick cooking spray. Drop cookie batter onto the baking sheet using a large tablespoon. Leave 3" apart between each cookie to allow for expansion during the baking process. Bake in a preheated 350 degree oven for 10 to 12 minutes or until done. Remove and let cool on a wire rack. Place cooled cookies into an airtight container for storage.

To Print: You can print the recipes on this blog by clicking on the SHARE button at the bottom of each post. A new window will come up and then look for & click on the PRINT button. You can print out just the recipe with no other blog items. Yay!